Cortex is all about personalizing email marketing in order to send customers engaging and relevant messaging. This personalization is made possible in transactional emails with the use of transactional rules. Similar to the use of Smart Segments with lifecycle stage emails, users must meet all of the requirements specified in the transactional rule to be eligible to receive the transactional email.
Transactional Rules are available for use in the Welcome Stage.
Setting up Transactional Rules
Building the Transactional Rule
Linking a Transactional Rule to an email
Confirming that the rule is applied
Updating an existing Transactional Rule
Setting up Transactional Rules
To add a Transactional Rule to a new Welcome email:
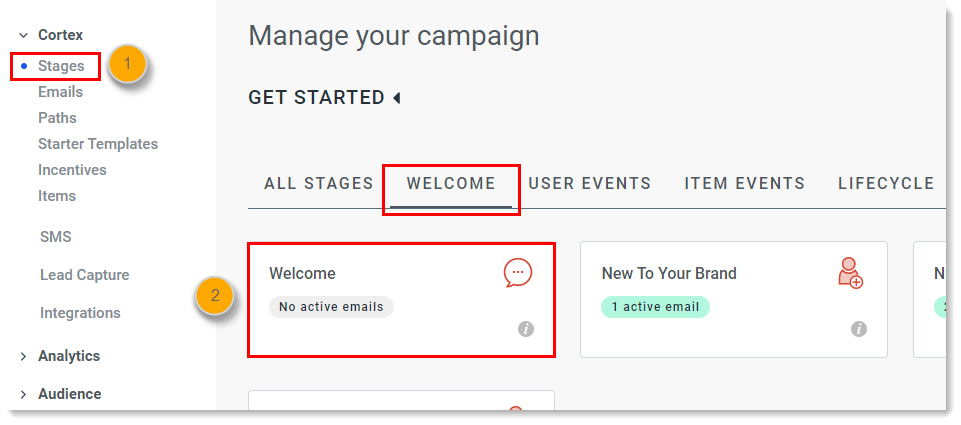
- Under the Cortex menu on the left, click Stages.
- Under the "Welcome" tab, click the Welcome block.
- Click New email > Create new.

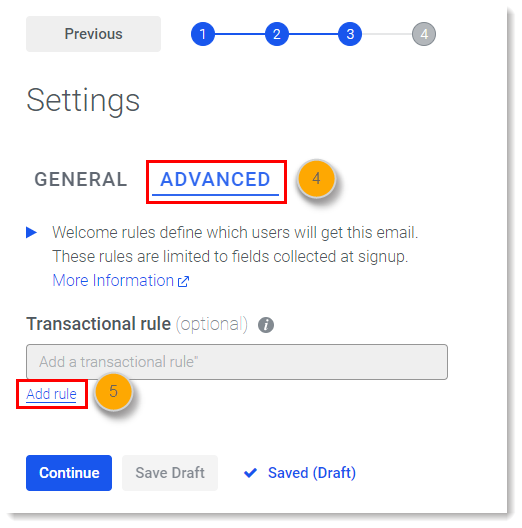
- Proceed through setting up your new email. When you get the the Settings page, click the "Advanced" tab.
- Click "Add rule."
To add a Transactional Rule to an existing Welcome email:
- On the Emails page, click on the dropdown and then click Edit.

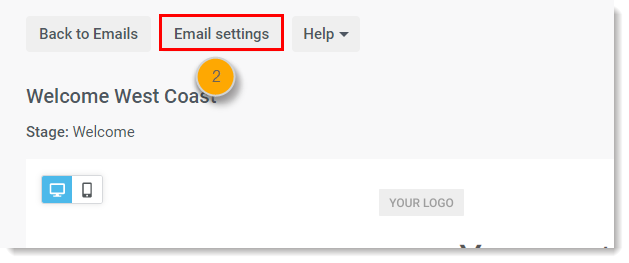
- Click on the Email settings button.
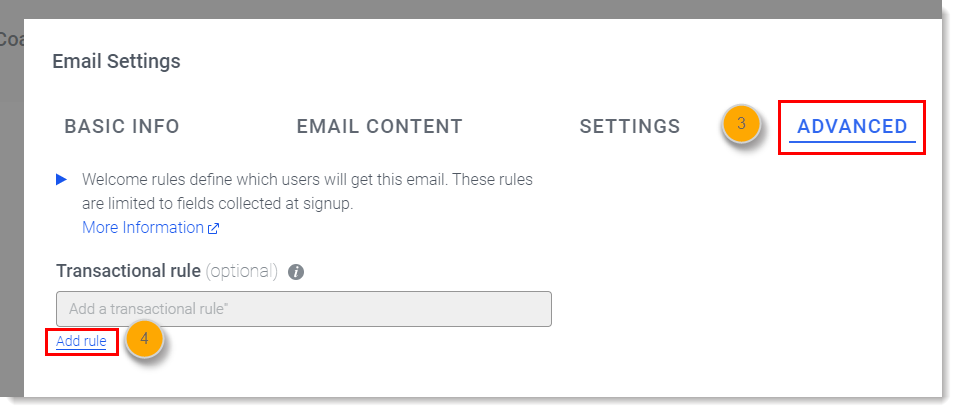
- Click on the "Advanced" tab.
- Click on "Add rule" to create the transactional rule for this email. If there is already a Transactional Rule applied, you can choose to edit or remove the rule.
Building the Transactional Rule
Creating the transactional rule is similar to creating a Smart Segment. User conditions can be added within AND and OR groupings to create a list of criteria that eligible users must meet. For example, the transactional rule below will send the Welcome stage email to California users only.
Additional information on building segments can be found here.

The available user attributes that can be used in transactional rules are: registration source, birthday, city, state, zip, country, email domain, and gender. Keep in mind that any attributes used in transactional rules must be captured and sent to ReSci with the request to create a new user.
Additional documentation on the create new user API call can be found here.
Saving the Transactional Rule
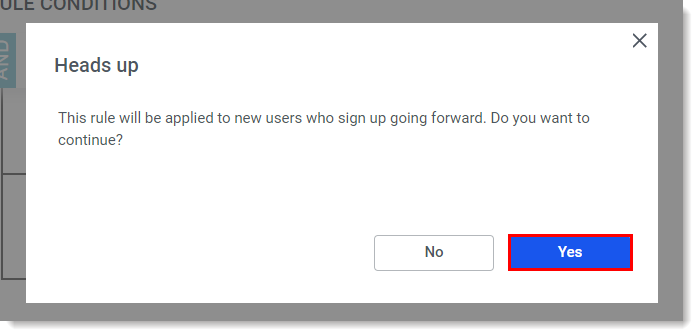
After configuring the transactional rule conditions, click "Save". The following message will appear to confirm that you would like to apply the rule. Clicking "Yes" will update the transactional rule conditions.
Linking a Transactional Rule to an email
When creating a new transactional rule for a given email, it is necessary to go through the process of saving the email by clicking "Continue" in the Editor page, and then clicking "Save Email" in the Summary page. This will link the transactional rule to the email.
Confirming that the rule is applied
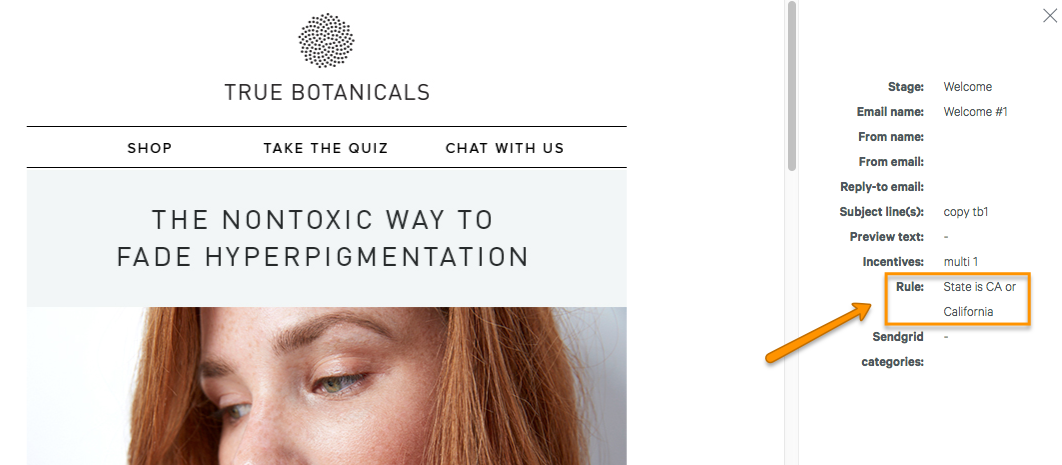
When viewing a list of emails, clicking on "Preview" will display the email settings, including the applied transactional rule.
Updating an existing Transactional Rule
When updating a transactional rule that is already linked to a template, it is not necessary to go through the process of saving the email. The transactional rule can be updated independent of the email since they are already linked. Clicking "Save" followed by "Yes" on the confirmation pop up will update the conditions of the existing transactional rule.
Comments
0 comments
Please sign in to leave a comment.