We highly recommend that you use Custom Keyed Entry for desktop modal and landing pages only. The two-tap button method performs significantly better than keyed entry on mobile. Keyed entry should be reserved for use cases where two-tap opt-in is not possible.
Create a List Building Campaign
Create a List Building Campaign
Here are the steps required to implement keyed entry input.
- Click SMS from the menu on the left.
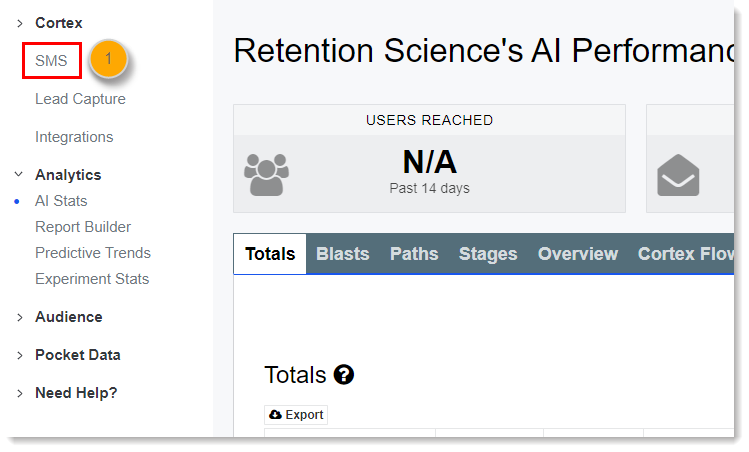
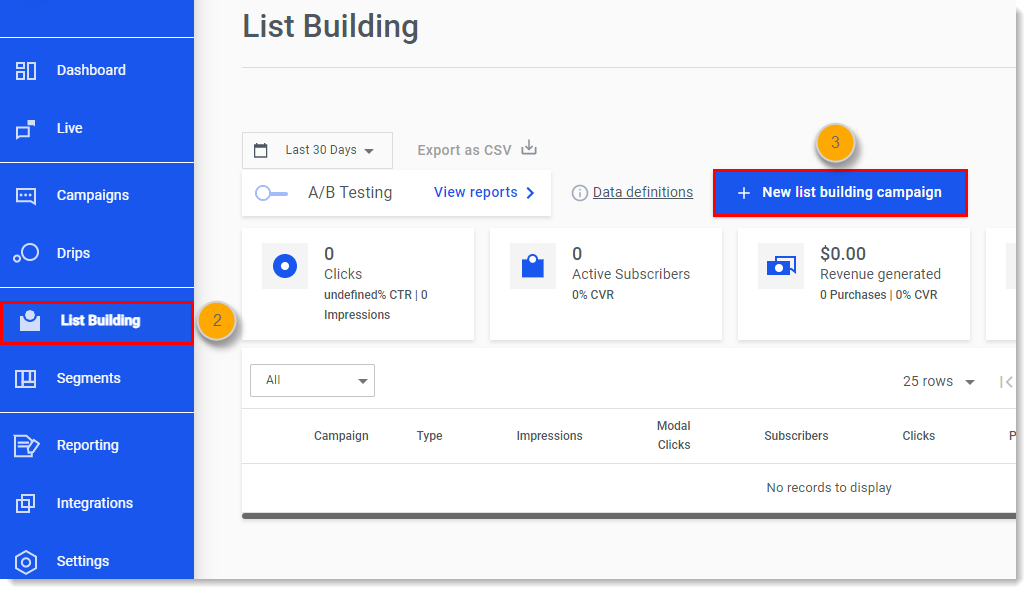
- Click List Building.
- Click New List Building Campaign on the top right.
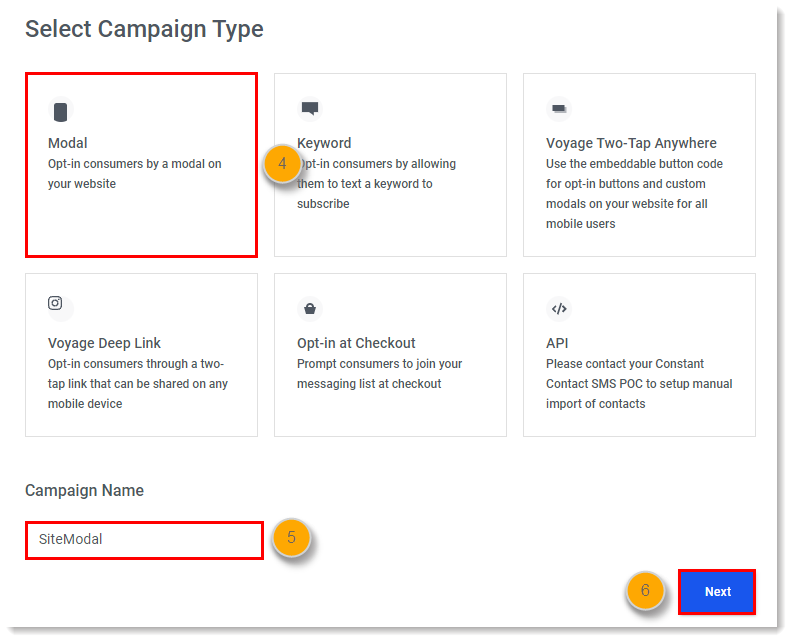
- Choose Modal as the Campaign Type.
- Enter a Campaign name.
- Click Next.
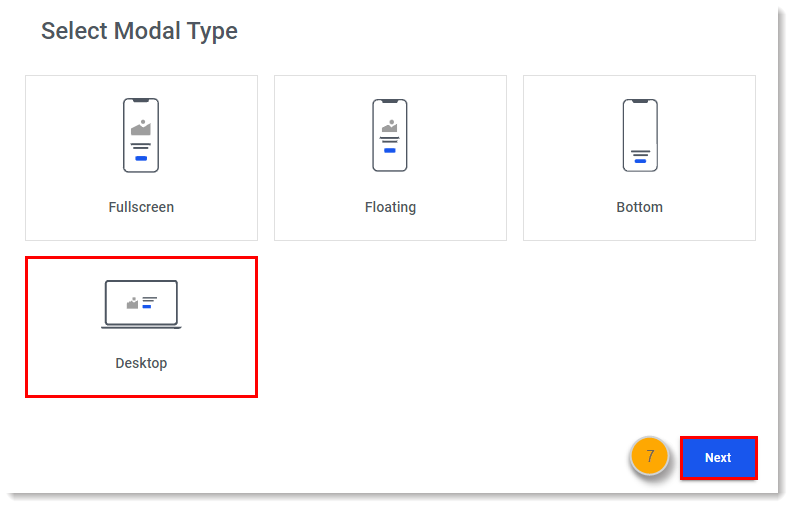
- Choose Desktop as the type and then click Next. You will not be using this modal template but need a Campaign ID per the below technical steps. This will allow you to generate that new Campaign ID.
- Click on the modal Settings tab
- Expand the Allowlist / Blocklist Pages toward the bottom of the page.
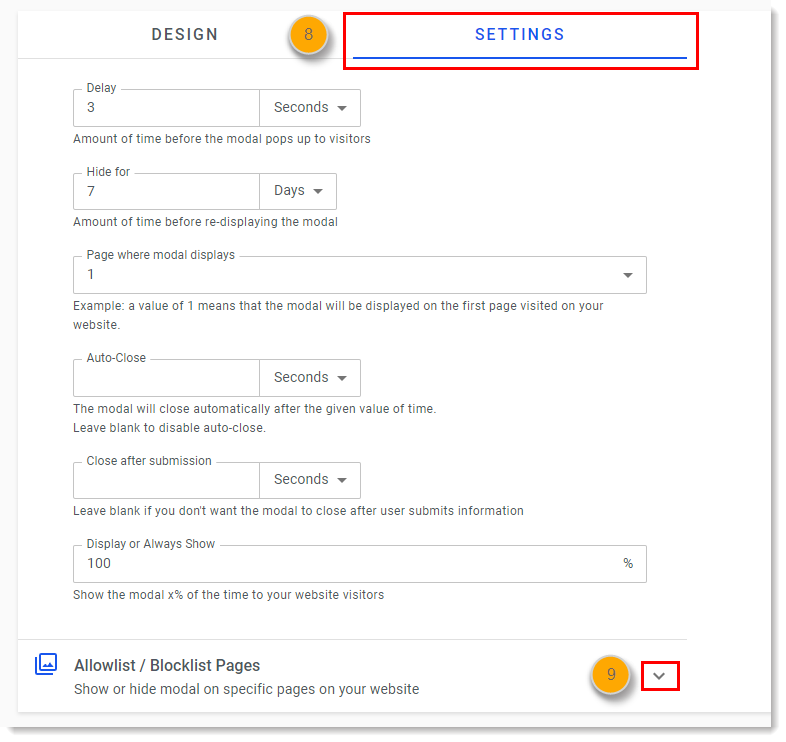
- In the Patterns text entry field, enter !/**
- Click Next.
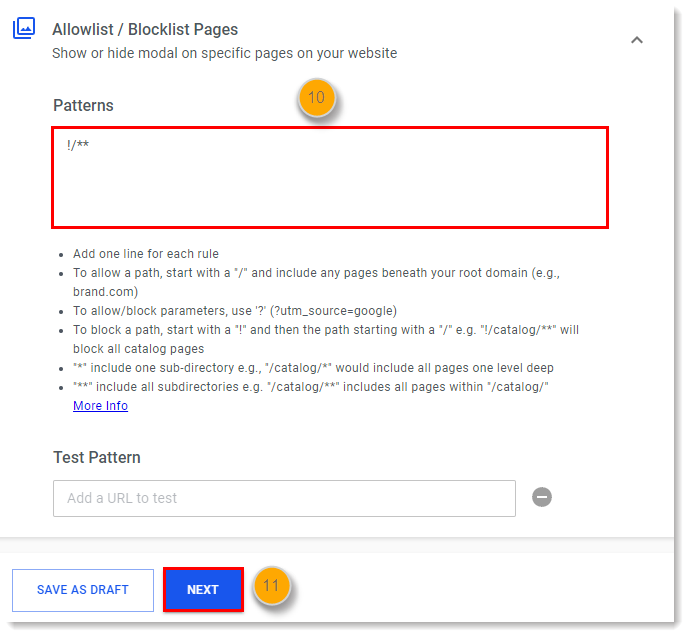
- Fill in the customer opt-in fields and then click Done. Stats will appear under this Campaign in your SMS dashboard.
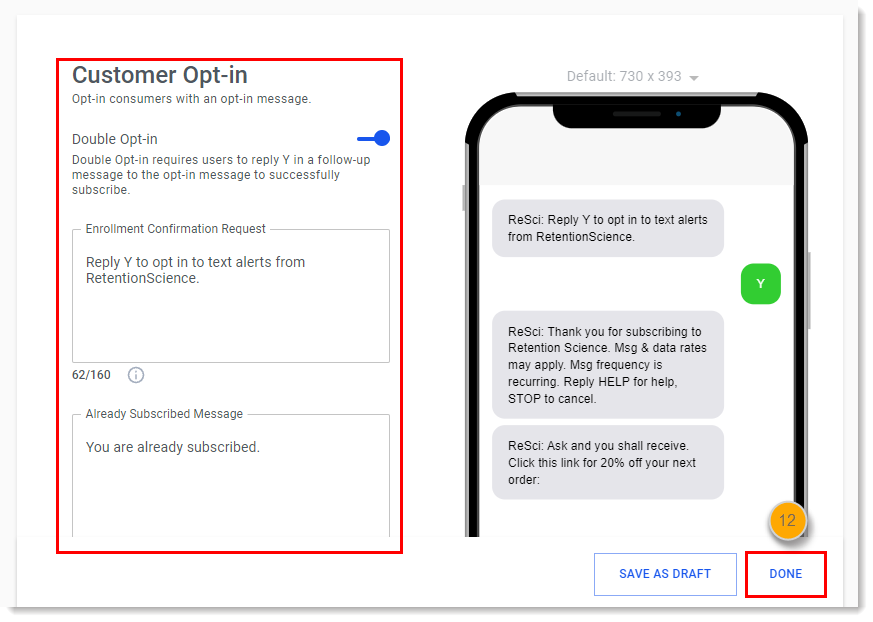
- Click Done again on the confirmation page.
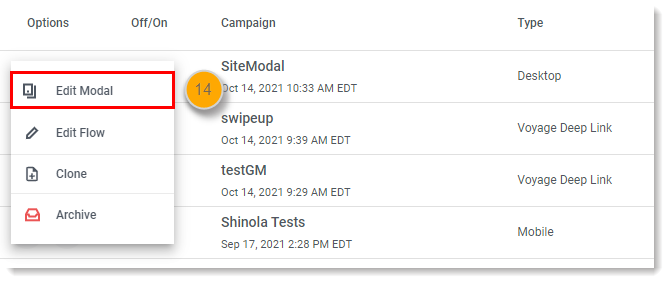
- Click the three dots to the left of the campaign and click Edit Modal.
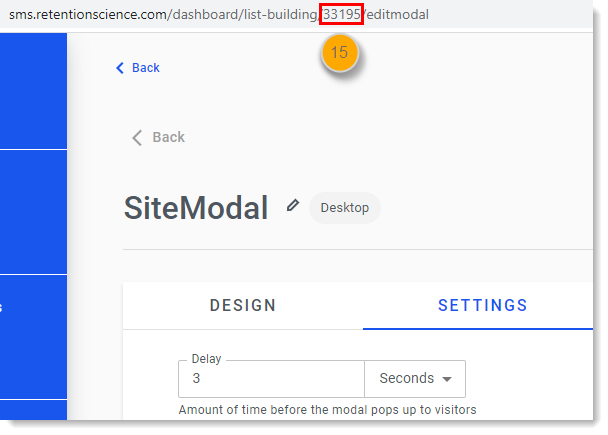
- Take note of your Campaign ID at the top of the page. This will be used in making the required API call to subscribe a consumer.
API Details
Technical details associated with making the API request are as follows. Please refer to the Using JavaScript section below for an example.
POST https://vyg.mobi/api/events/subscribeNumber
Payload
{
     PhoneIn: <phone starting with +1> (e.g., +13108293002),
     CampaignId: <campaignId> (e.g., 1234)
}
Expected Responses
200 Already Subscribed
201 Subscribed Successful
Using JavaScript
Below is an example that you can use to send the phone number from the client-side of your application. This script may be included above the close of your </body> tag or within your <head> tag.
<script type="text/javascript">
      function formatPhoneNumberToInternational(value) {
        var normalized = normalizePhoneNumber(value);
        var international = '+1' + normalized;
        return international;
      }
      function normalizePhoneNumber(value) {
        var normalized = value;
        if (value) {
          var onlyNums = value.replace(/[^\\d]/g, '');
          normalized = onlyNums.slice(0, 10);
        }
        return normalized;
      }
      function subscribe(phoneNumber, campaignId) {
          var XHR = ("onload" in new XMLHttpRequest()) ? XMLHttpRequest : XDomainRequest;
          var xhr = new XHR();
          xhr.open("POST","https://vyg.mobi/api/events/subscribeNumber", true);
          xhr.setRequestHeader("Content-Type", "application/json");
          xhr.send(JSON.stringify({
            PhoneIn: formatPhoneNumberToInternational(phoneNumber),
            CampaignId: campaignId
          }));
          xhr.onreadystatechange = function() {
            if (xhr.readyState != 4) return;
            if (xhr.status == 201) {
	//Subscribed
            } else if (xhr.status == 200) {
	//Already Subscribed
            } else {
	//Failed
            }
          };
      }
</script>
Note: Phone numbers must be formatted correctly to subscribe to our system. If using the code above, it includes simple phone normalization for the correct format.
You will then need to pass the Campaign ID and Phone Number variables below when a user submits their phone number.
Method
subscribe(phoneNumber, campaignId);
Example HTML Form Submission
<script type="text/javascript">
// Set the Campaign ID for the submission
var campaignId = 1234;

// Retrieve the form element by the id attribute
var form = document.getElementById('my-form');

if (form) {
  form.addEventListener('submit', function (event) {
    // Retrieve the phone number from the field containing "phone" in name attribute
    var phoneField = form.querySelector('input[name~="phone"]);
    var phoneNumber = phoneField ? phoneField.value : '';

    // Optional: Prevents reloading the page if using a standard form submit.
    // event.preventDefault()

    // Optional: Validate form has all correct details
    // validate();

    // Submit the phone number
    subscribe(phoneNumber, campaignId)
  });
}
</script>
Comments
0 comments
Please sign in to leave a comment.