
Justuno is a popular on-site conversion product that allows you to create lead/email capture forms.
With the Justuno x ReSci integration, you can use Justuno’s on-site conversion optimization tools to grow your email list and engage with customers and push them directly into ReSci. You can also trigger immediate Welcome Stage emails to these users who've signed up on your Justuno forms.
Table of Contents
Installing the Justuno Plugin
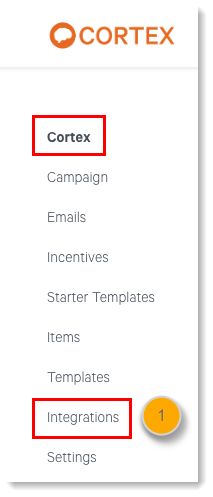
- Navigate to the Integrations Center in Cortex by navigating to "Cortex" and then "Integrations."
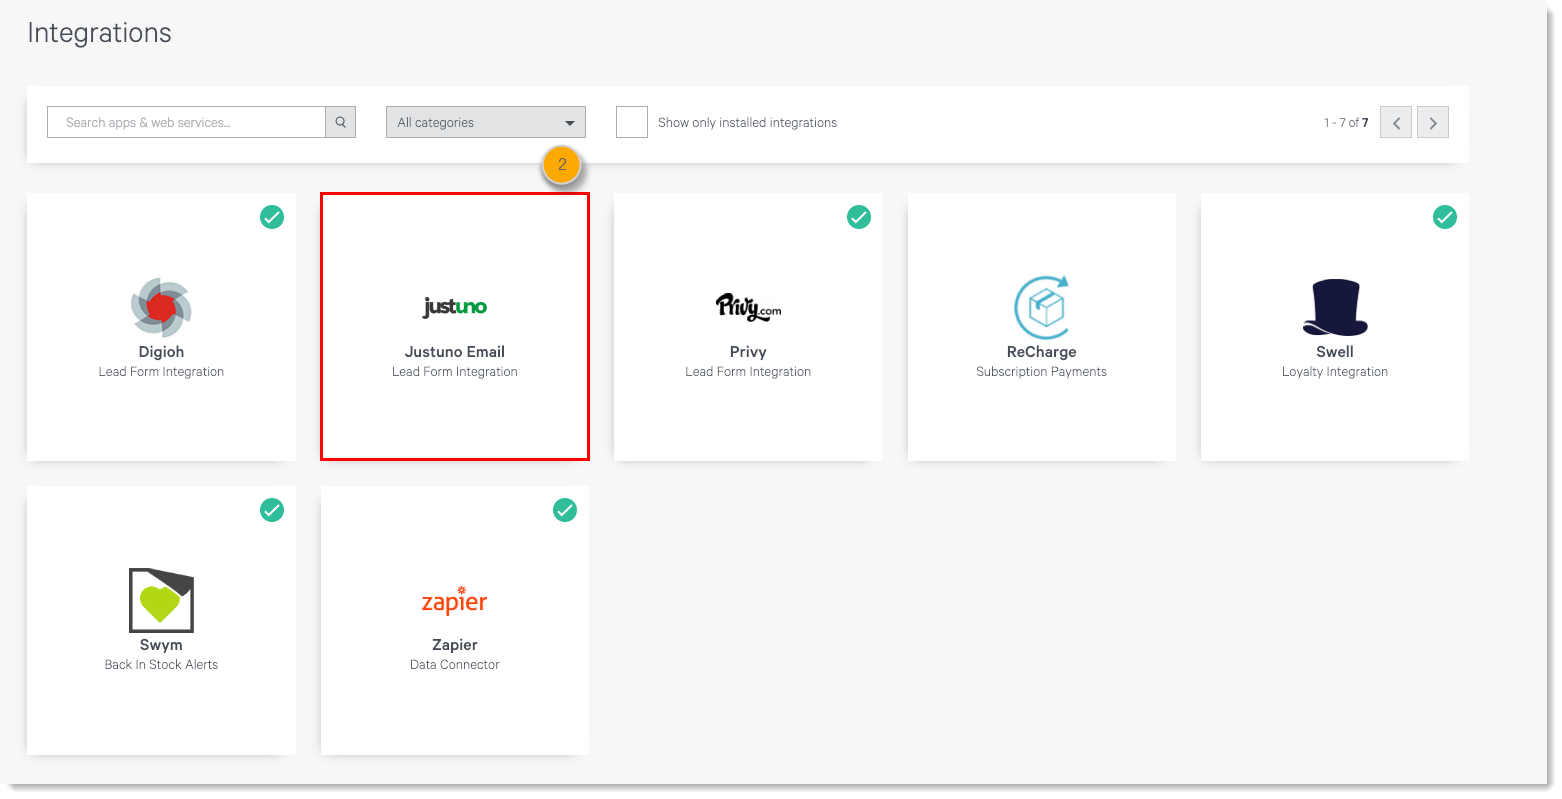
- Search for "Justuno" or click on the Justuno plugin to open the Justuno plugin page.
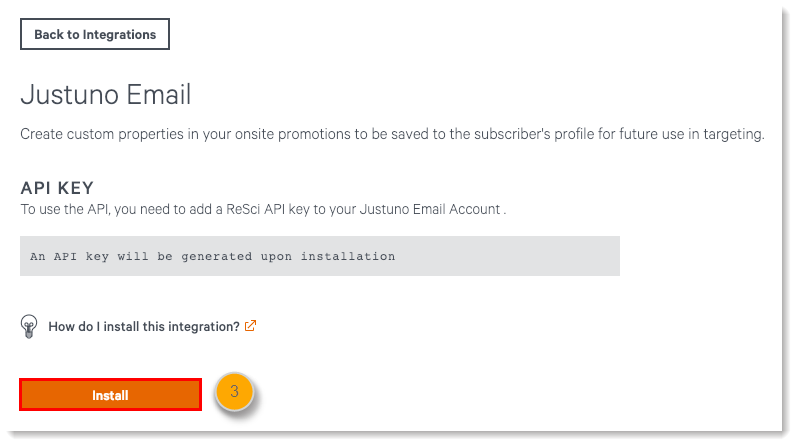
- Click Install and wait for the plugin to complete installation.
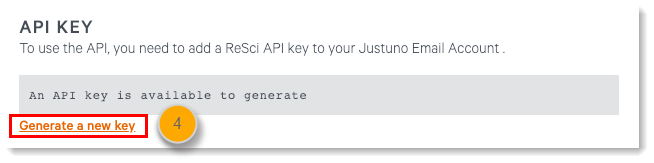
- Once installed, click "Generate a new key" under the "API KEY" section and use this key to enter into Justuno – this will be used to enable the integration and for authentication
Enabling the Integration
- Copy the API Key generated from the Justuno plugin (see step 4 above).
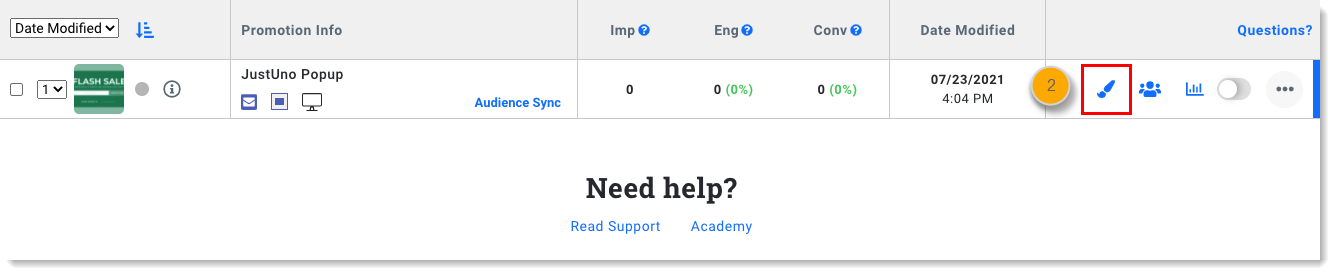
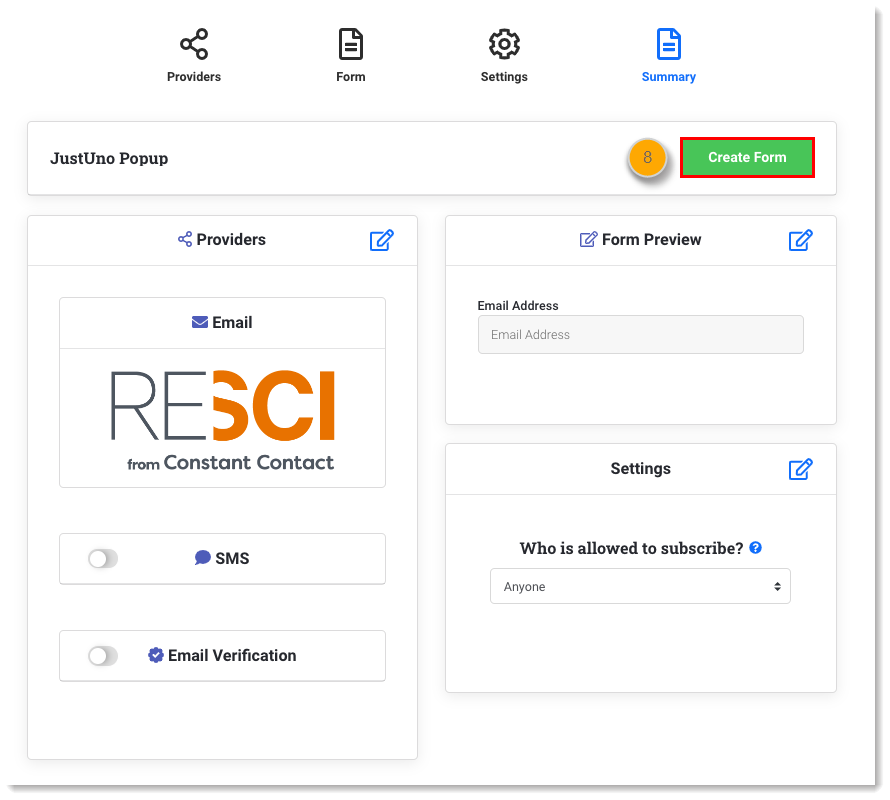
- Open your Justuno promotions in the design canvas, click Edit icon.
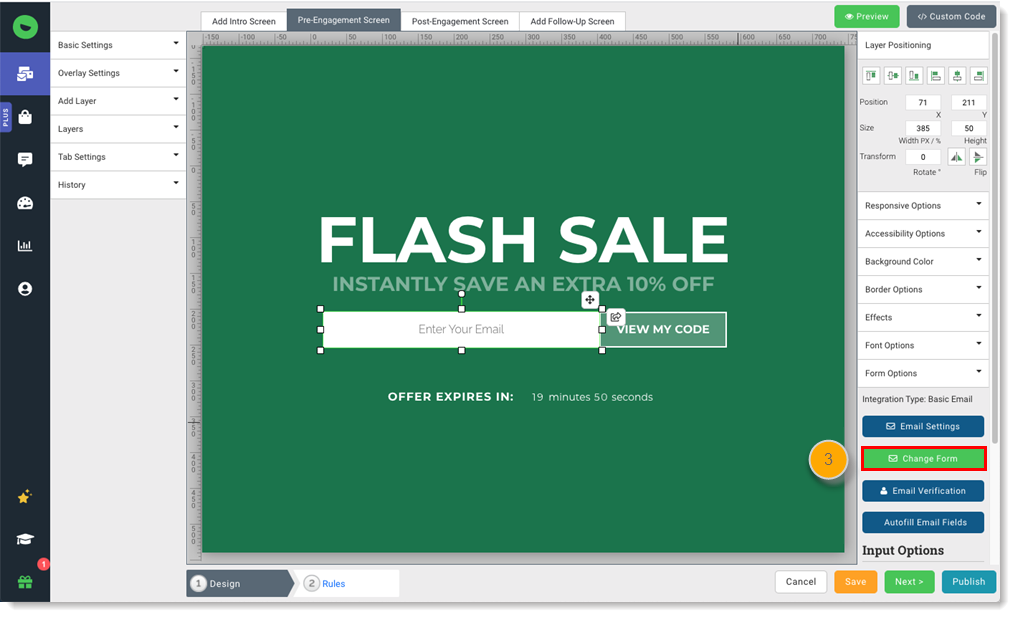
- In the design canvas, select the email field. Click the Change Form button on the Form Options menu on the right side.
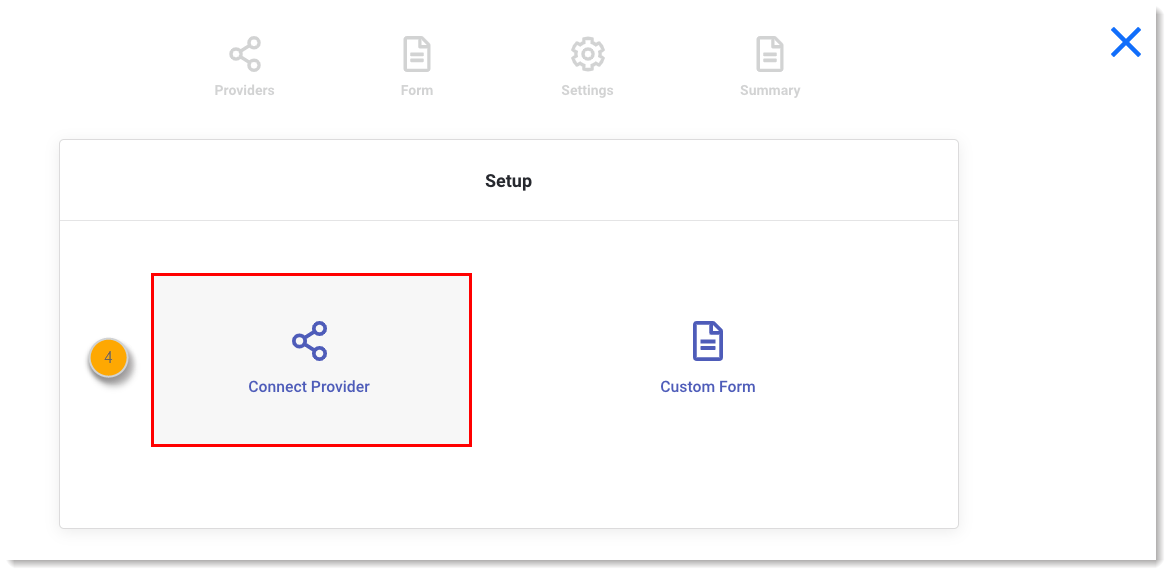
- If an existing integration is set, click on the edit at the top right corner of the Providers section. Otherwise select Connect Provider.
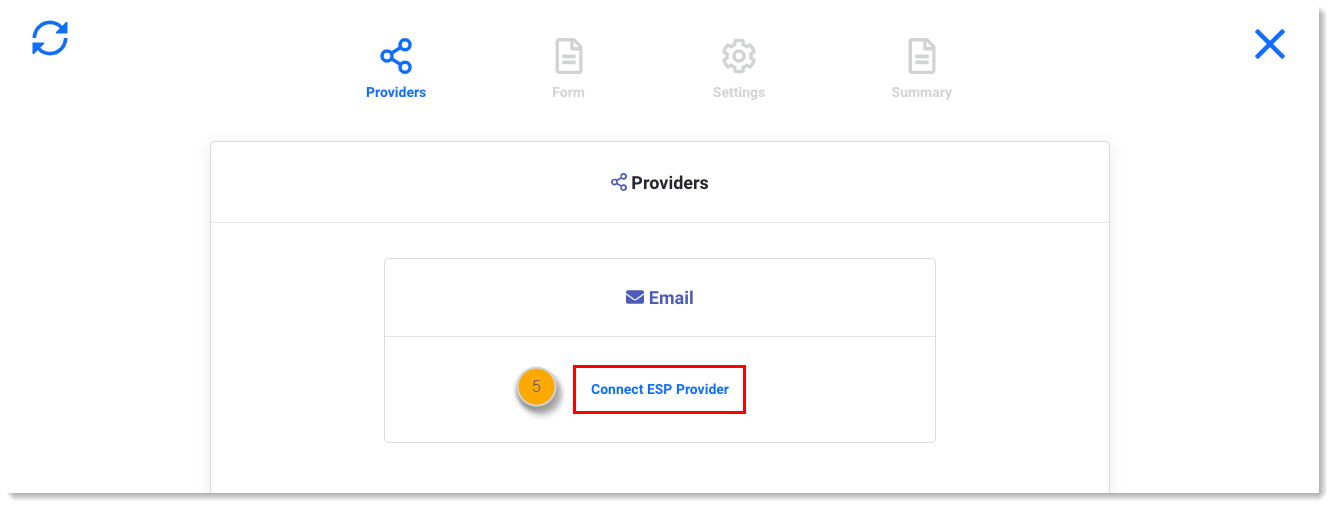
- Then select Connect ESP Provider.
- Then select the tile that is labeled RESCI and proceed to enter your API Key to link the promotion form fields to Retention Science.

- You'll be prompted for the ReSci API key – enter the Key from the Justuno Plugin here.

- Add or remove fields as desired, then click Create Form to complete the integration process. This screen will show you the options for the information fields to pull, select the desired options. There is an option to add more fields if desired.
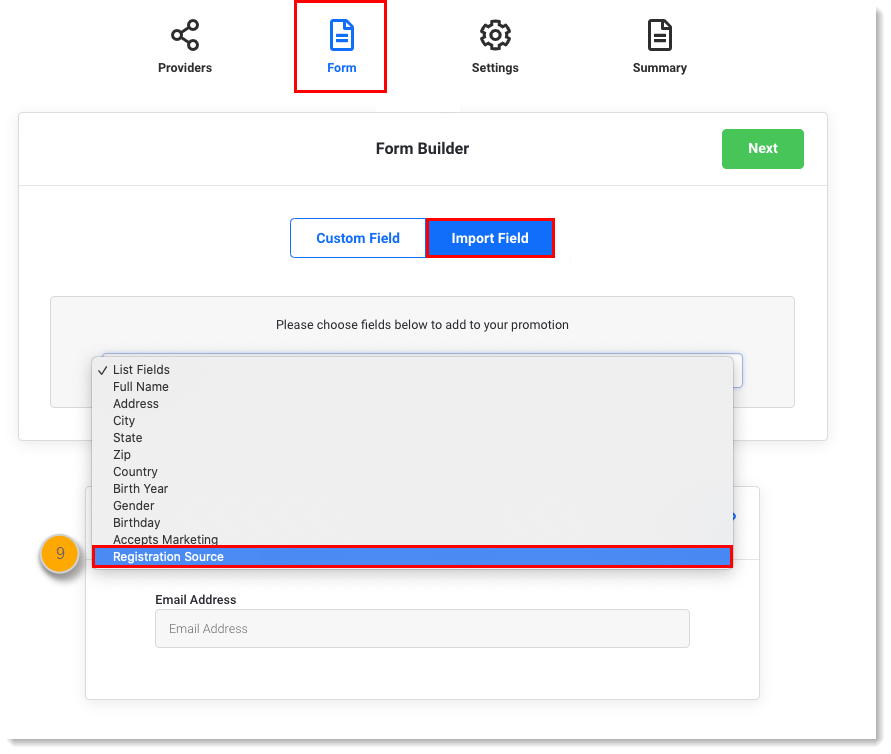
- Please note, that is best practice with ReSci to set a Registration Source. This will allow you to segment users based on how they entered the platform. You can do this by using a hidden field by clicking on the Form section, then click Import Field and select Registration Source from the dropdown.
- Once the Registration Source field is added, click on the Edit icon.
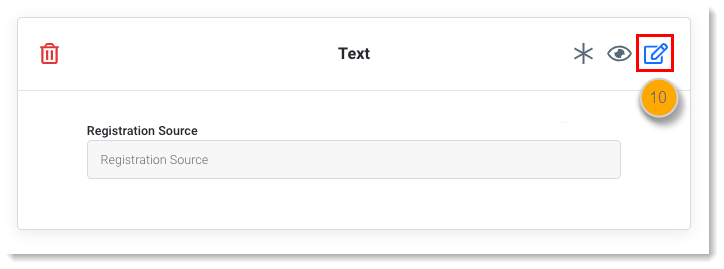
- Click on the dropdown to expand the settings. Then check the Required and Hidden checkboxes, and enter your desired registration source value in the Default Value field.
- Lastly, be sure to click the Save button.

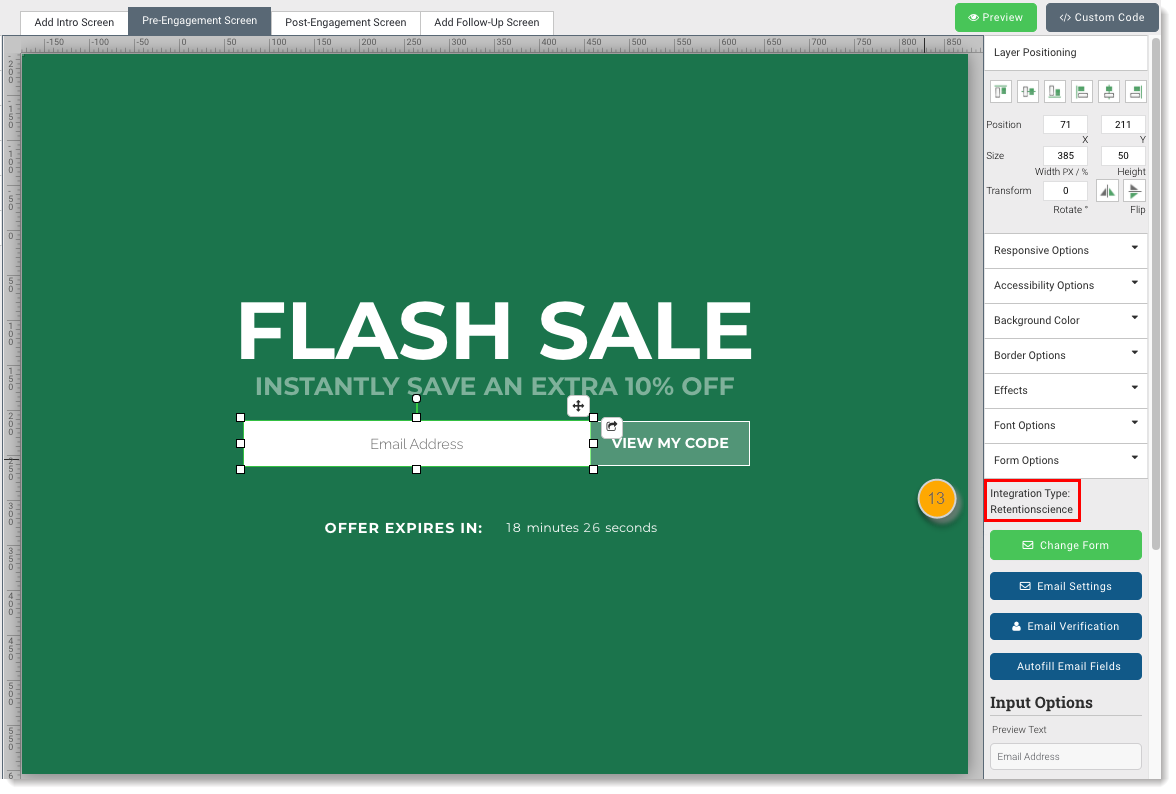
- Upon creation of the form in the design canvas, you will note on the right hand side where the "Change Form" option is located, that Integration Type now reads as "retentionscience".
- You are now ready to publish your promotion and give it a test!
Integration Data
Justuno has access to the User create API which allows you to create configurable fields on the campaign. We support the standard attributes listed below in addition to custom attributes that have been set up for your account.
Standard Attributes
Please note that Justuno sets the User id to the MD5 hash automatically.
| Fields available to JustUno | Required | Default Value |
Notes
|
|---|---|---|---|
| yes | |||
| full_name | no |
User's full name (first and last). |
|
| address1 | no | ||
|
address2 |
no | ||
| state | no | ||
| zip | no | ||
| country | no | ||
| phone | no | ||
| birth_year | no | ||
| gender | no |
Values
|
|
| registration_source | no |
The source of the user's registration typically used for user segmentation |
|
| birthday | no | format must be YYYY-MM-DD | |
| send_transactional_welcome | no | true | When true, an email is sent to new users when there is an available template in the Welcome stage. When false Welcome emails will not go to new users. The default for this setting is true. |
Custom Attributes
- Email help@retentionscience.com to ensure your custom attributes are configured for your account.
- Once these custom attributes are configured for your account, they will appear as filters automatically in Smart Segments under "Custom Features."

Comments
0 comments
Please sign in to leave a comment.