Dynamic content in emails can be tricky. Sometimes you want to set rules about how content can or should be displayed. This article will cover the basics of Display Conditions in the Cortex template builder. We will use the structure "If This Then That" to describe the function of these blocks.
What does this look like in use?
Add a display condition
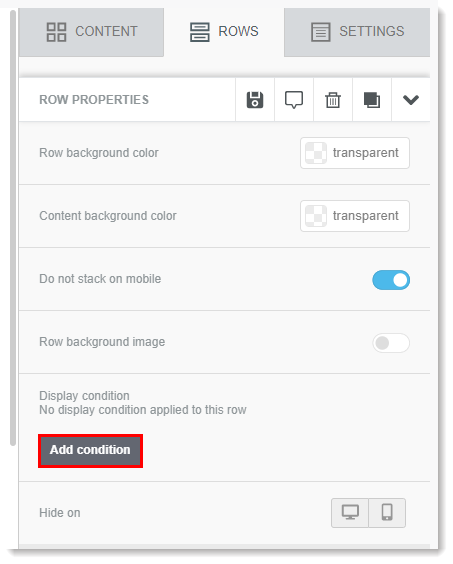
First, select a row in your template.
Next, select "add condition" from the "Rows" menu on the right.
Too see this in action: take a look at our Video Demonstration.
Build a display condition
First, familiarize yourself with If/Else statements using our First Name merge tag example. Your display conditions will be structured in a very similar fashion.
Determine your display condition
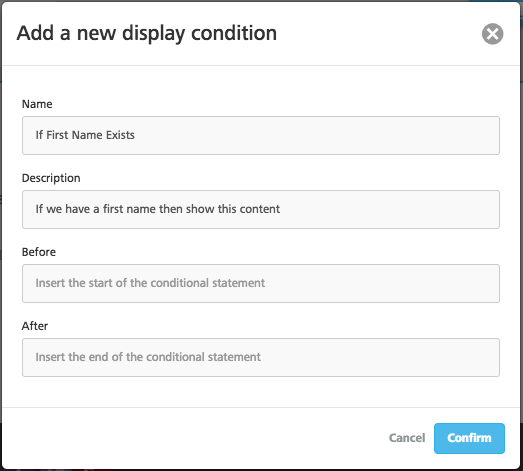
Your display condition is the "If This" of "If This Then That". To use the first name merge tag, we will say "if the First Name exists."
Add a Name and Description that will be easy to remember and understand:
Write your display logic
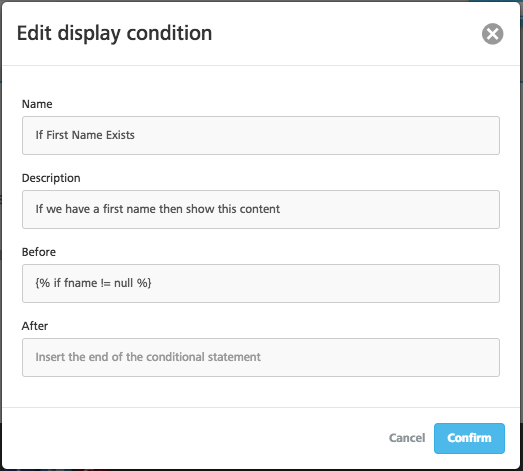
Your display logic will always be written in the same structure and will look like {% if (comparison statement) %} Your comparison statement should consist of a merge tag and a known value, like "state == 'CA'" If you want to reference a value that does not exist, you can use two empty quotes '' (empty string) or the word null. String values (words) must be wrapped in single quotes 'like this'. Comparison statements can be combined using "and" and "or" to create complex logic. The available operators are listed below:
| Comparison | Operator |
| Is, Equals | == |
| Is Not, Does Not Equal | != |
<, >, <=, and >= are not currently supported.
Example: (This will read "if the first name merge tag is not null" )
Close your display conditions
Use the {% else %}{% endif %} tags to close your display conditions.
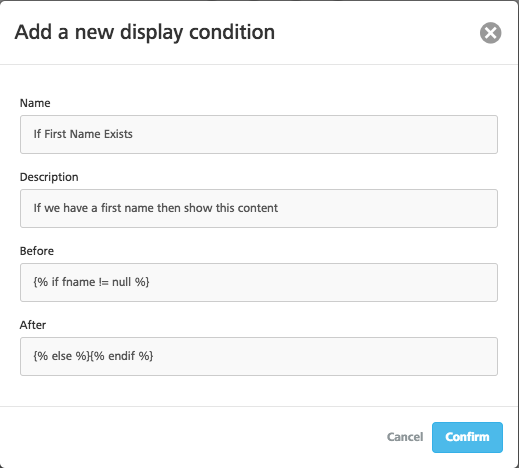
Important! Make sure to use both {% else %} and {% endif %} for "After", otherwise the display conditions will not work!
What does this look like in use?
It's important to remember that this affects your template across an entire row. Unlike using conditionals in a text box, or when using custom html, you cannot affect a single link or single word; the content displays all-or-nothing.
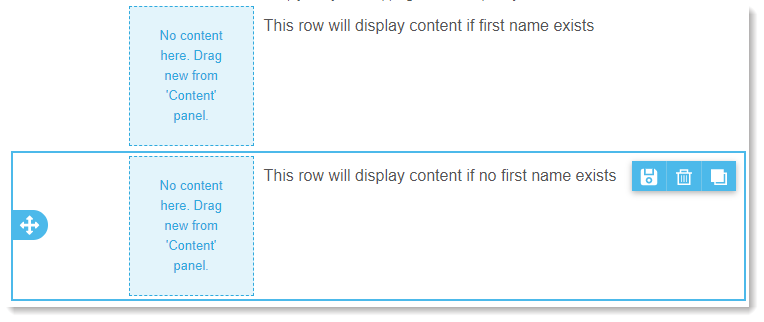
You will want to use the clone tool to create copies of your content. Once you have copied your content, define the two pieces of content. Note that when using the clone tool, your display conditions copy over. To see this in action: take a look at our example video.
Click the copy icon in the upper-right corner to copy the row:

The duplicated row will appear below the original row:
Need more examples? See: Display Conditions for "Only (Stage)" Recommendation Schemes
Comments
0 comments
Please sign in to leave a comment.