
Automate your campaign by sending relevant and personalized content to each of your users — all at scale with Paths. Paths use automated A/B testing to optimize toward the highest performing variant in each Email step.
In this article, you’ll learn how to set up an Email step and create variants to communicate with your users.
Add an Email step and create Variants
Each Email step in your path represents a single touchpoint, where you can add variants, or different versions of your content. Using multiple variants helps you understand how changes to your content can impact the performance of your marketing strategy.
- Drag an Email step into your path.
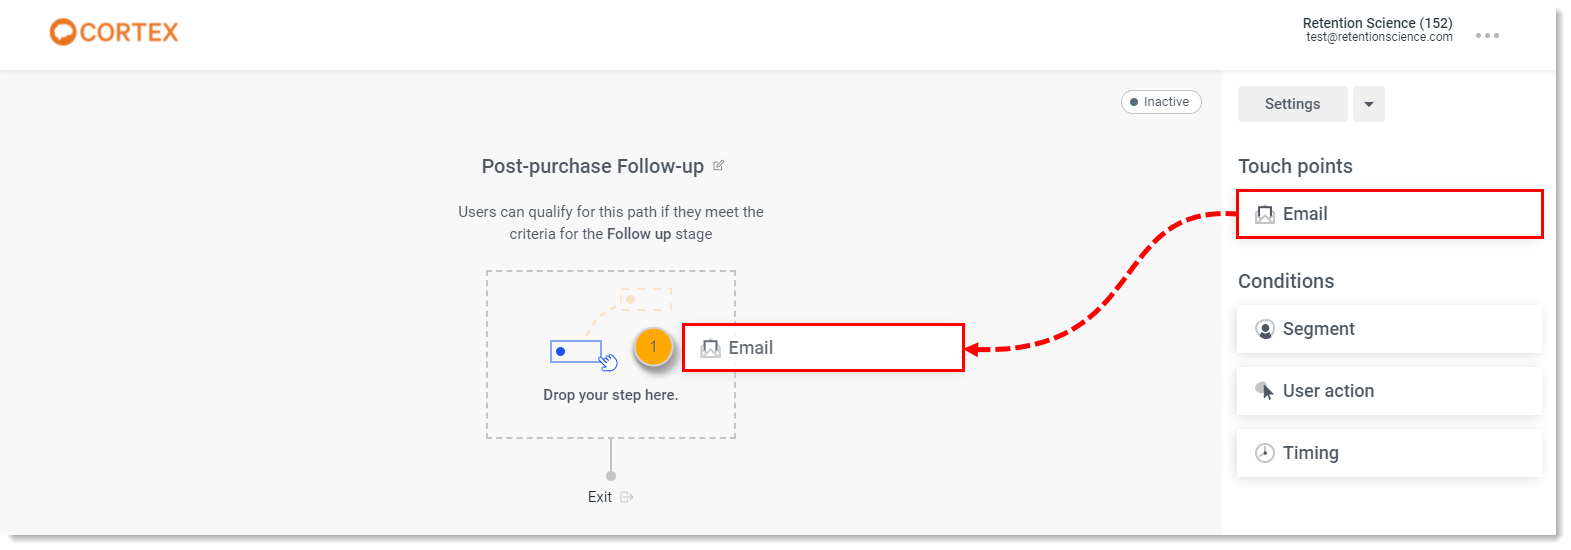
- Click on the new Email step.
- Click Add Variant.
- Click "Edit" to customize your email. Repeat as necessary until all the variants have been created.
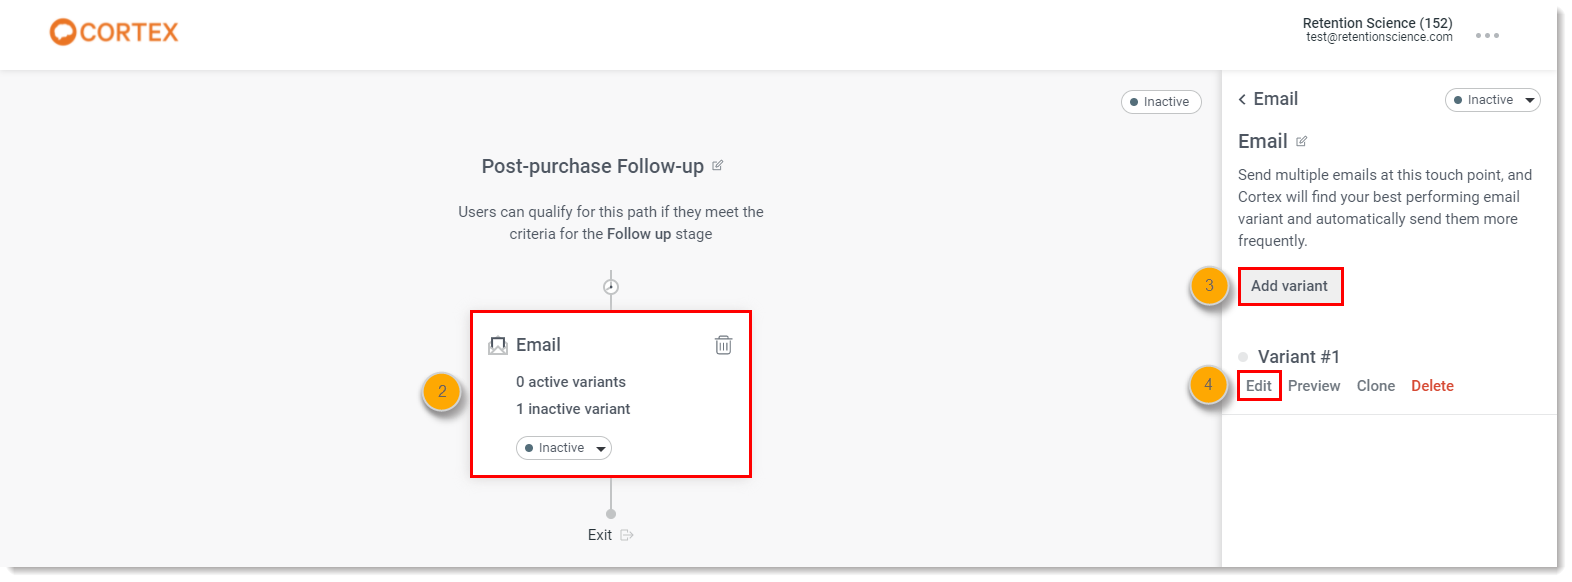
Users in a path automatically receive one variant in each Email step that they enter. Each variant consists of a template and its settings. As you build variants, consider testing the following:
- Layout - Test how completely different designs perform for a given Email step. If you want to make only minor modifications to an existing variant, you can click Clone to copy your content into a new variant.
- Image - Use different images in your variants to understand which styles resonate best with your audience. You can also test how a small number of larger images perform against lots of smaller images.
- Email sender - Sender details can shape whether users will open your emails. For example, you can test how using an employee’s name and email address compares against your brand name.
- Copy - Play around with style and formatting. For example, you can compare brief bullet points against longer paragraphs.
Set the status of an Email step and its Variants
The status of an Email step determines whether users in the path can enter the step. Like Email steps, each variant has its own status: active or inactive. By default, newly created Email steps and variants are inactive. To activate an Email step, you must have at least one active variant, and the status of a variant can be changed in the variant’s settings in the side panel.
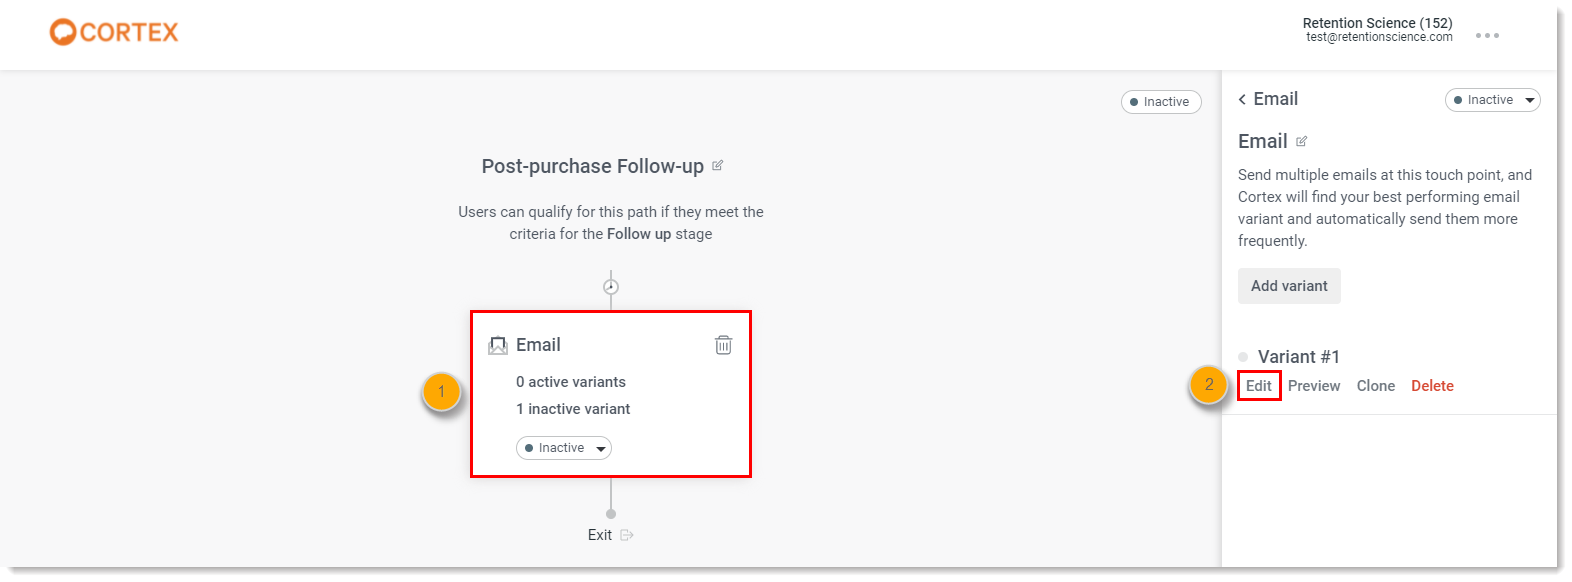
- Click on Email step you want to activate.
- Under the variant you want to activate, click "Edit."
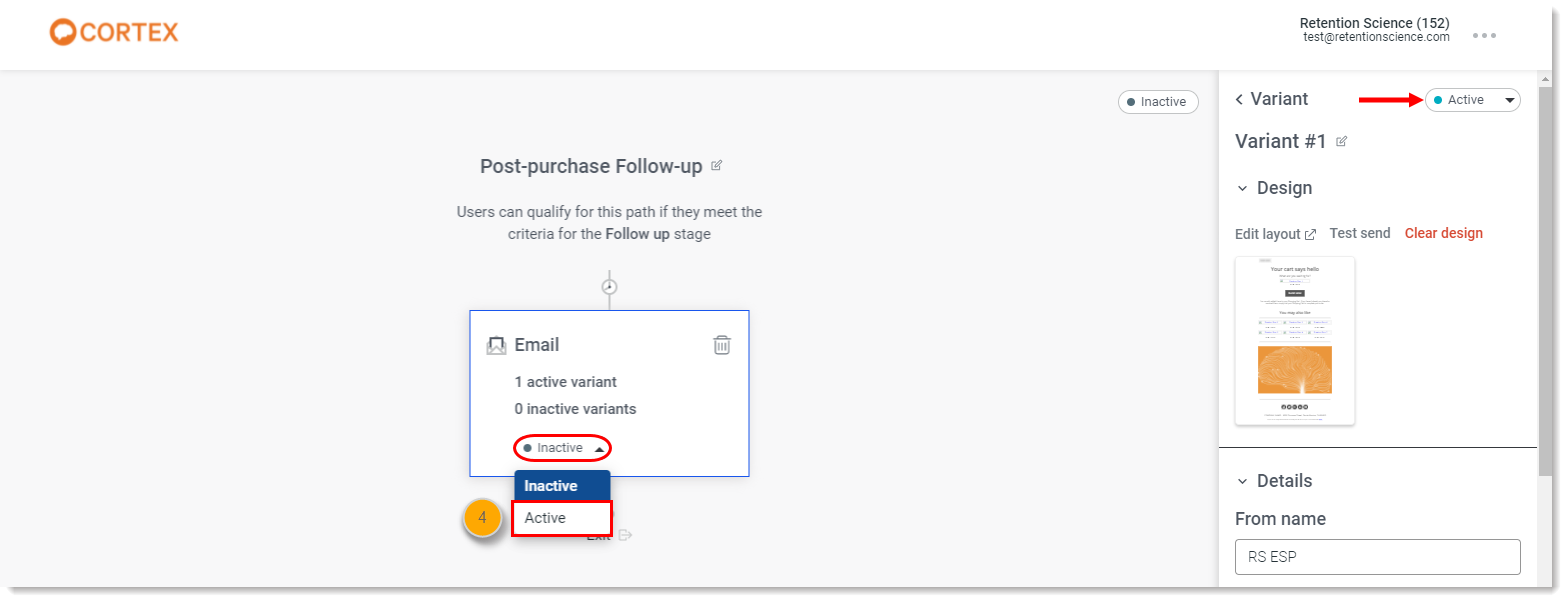
- For the Variant, click Inactive > Active.

- Once the Variant is active, you can click Inactive > Active for the Email step.
Users entering an active Email step only receive active variants. If an Email step is inactive, then users won't receive any variants in that step, and skip to the next active step in the path.
Leave unfinished variants as inactive to make sure that users don’t receive the variant until you’re ready. If you change the status of a variant from active to inactive, then all pending sends are automatically canceled, and users no longer queue up to receive the variant.
Comments
0 comments
Article is closed for comments.