
In this article, you'll learn how to configure the specific settings for each path in the Settings panel.
- Add a trigger for a path
- Set the status for a path
- Remove users from a path
- Limit how often users can enter a path
- Assign a subscription interest to your path
Add a trigger for a path
A path’s entry rules determine how someone enters a path based on events or triggers like user attributes, purchase history, and browsing behavior. For example, you can trigger a path whenever someone subscribes to marketing or after they purchase from a specific category.
The entry stage targets users who qualify for an automated Cortex stage, while an entry condition uses Smart Segments to target users who meet the defined criteria. A path can be triggered by a Cortex stage, a segment, or a combination of a Cortex stage and a segment.
- To configure a path’s entry rules, open the path’s Settings panel.
Set the status for a path
The status of each path determines whether the path is live for users. Users can only qualify for and enter active paths.
Activate
To activate a path, click on the Publish button to make all of your changes live, and then set the status of your path to Active.
Note: Make sure to set each individual email variant to Active before publishing and activating the entire path.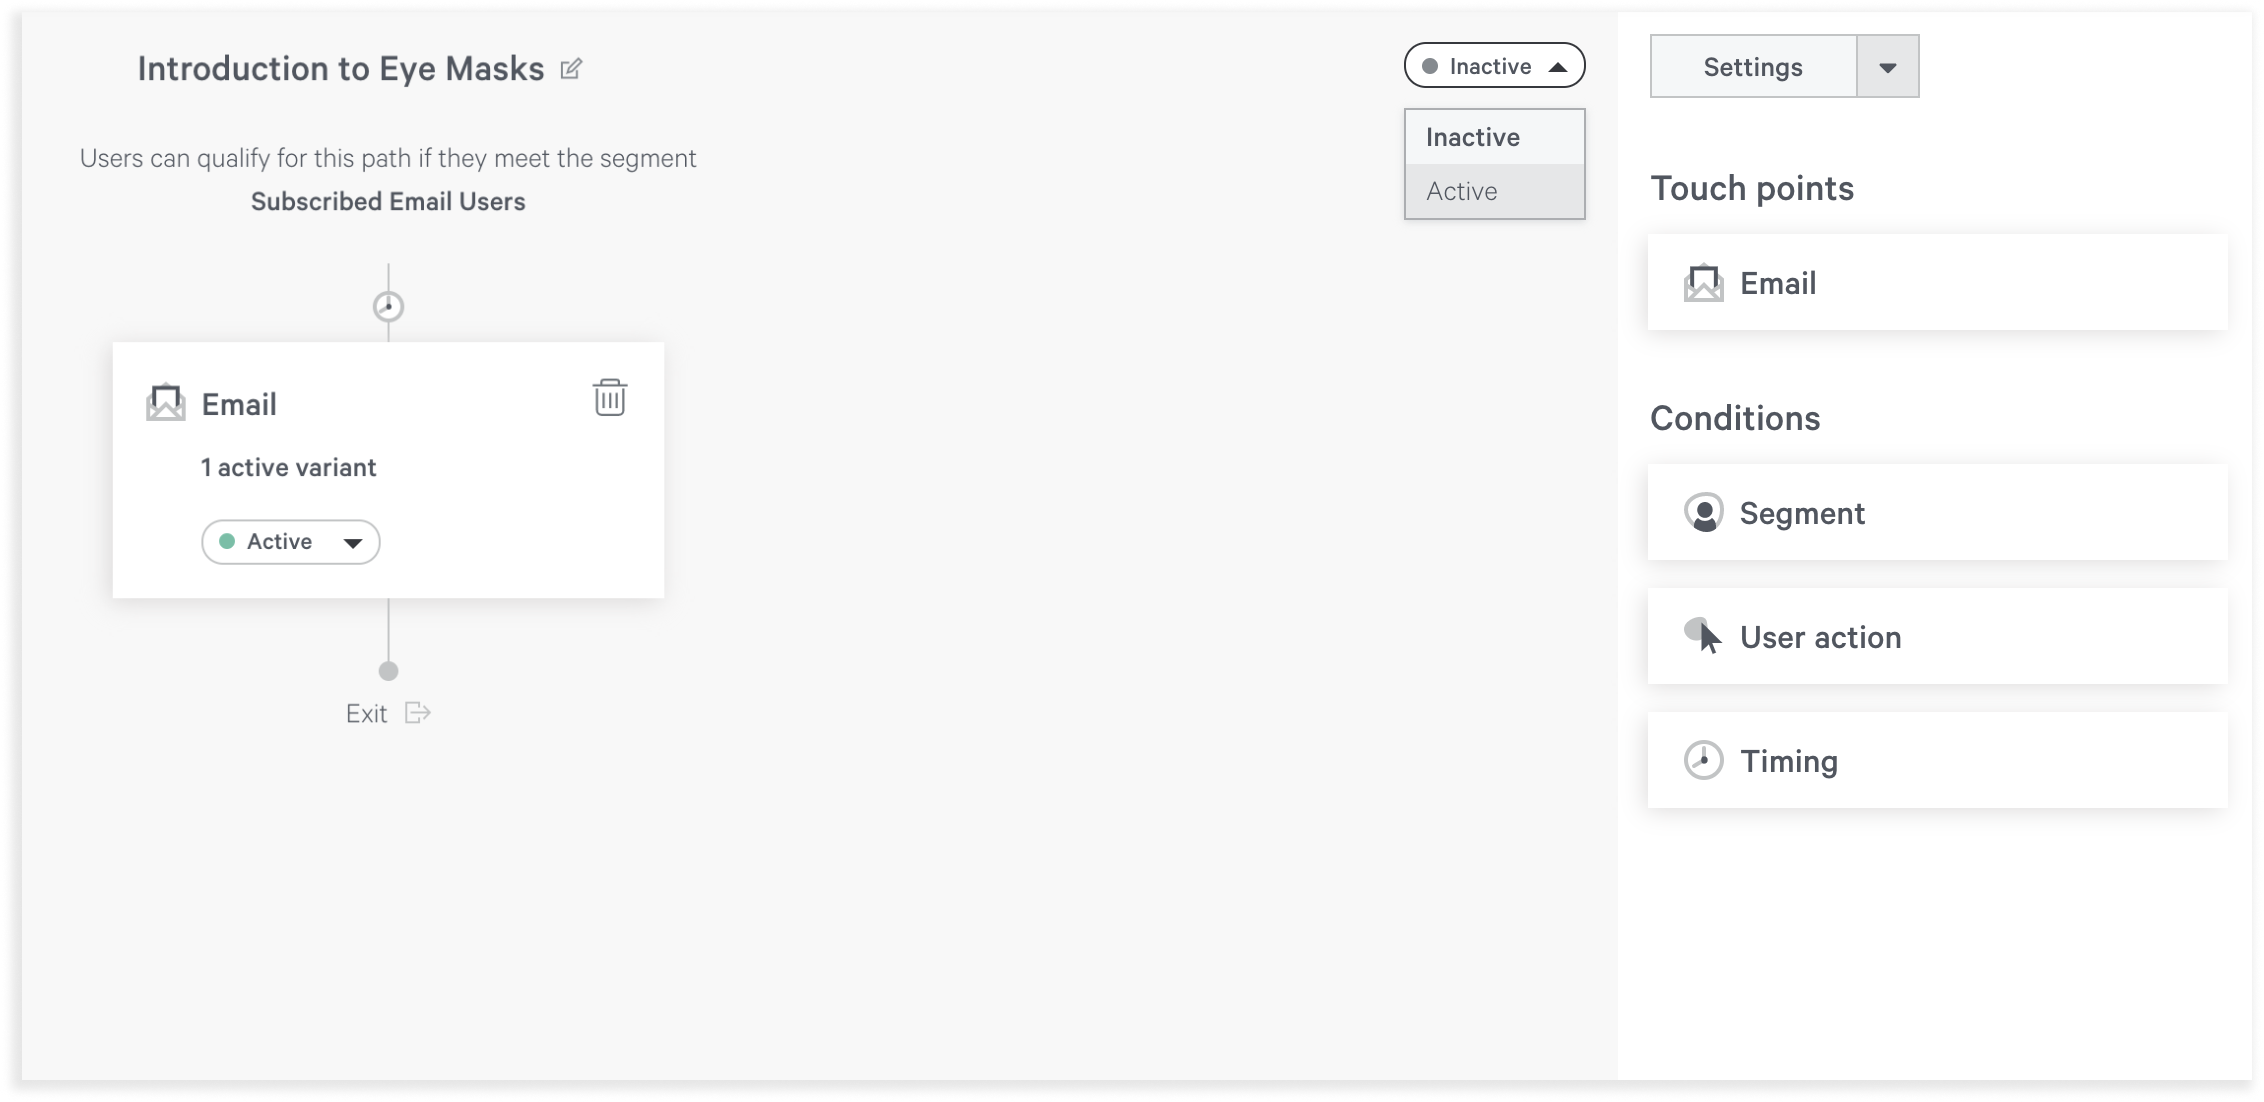
Deactivate
When you deactivate a path, all users who are currently in the path will exit, and any pending sends will be automatically canceled. If you reactivate this path, previously kicked users will have to qualify for the entry rules again to re-enter the path.
Remove users from a path
When you create a path, you can optionally set an exit condition to automatically remove users in the path. Whenever someone meets this condition, they will instantly exit, and any pending sends will be automatically canceled. For example, if you create a path that targets unengaged users, you can set an exit condition that removes users from the path if they make a purchase.
To set an exit condition for your path, open the path’s Settings panel and select a segment or list in the Exit condition dropdown menu.
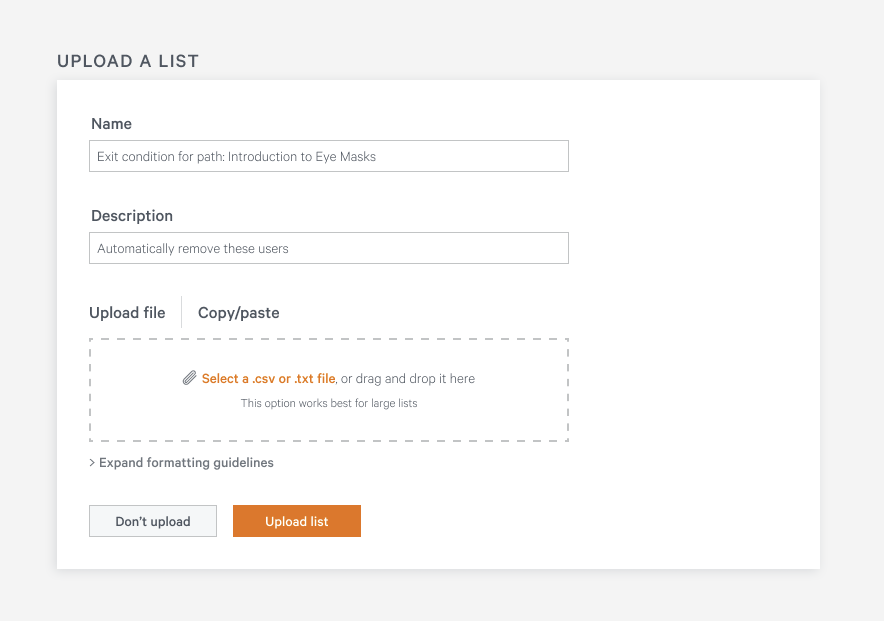
A path’s exit condition can also include a list of specific users. To remove specific users from a path, follow the steps below:
- Navigate to Audience > Segments.
- Upload a list of users that you want to remove from the path.
- Navigate to the segment that controls the path’s exit condition.
- Click Add to create a new condition, and select Users in Segment.
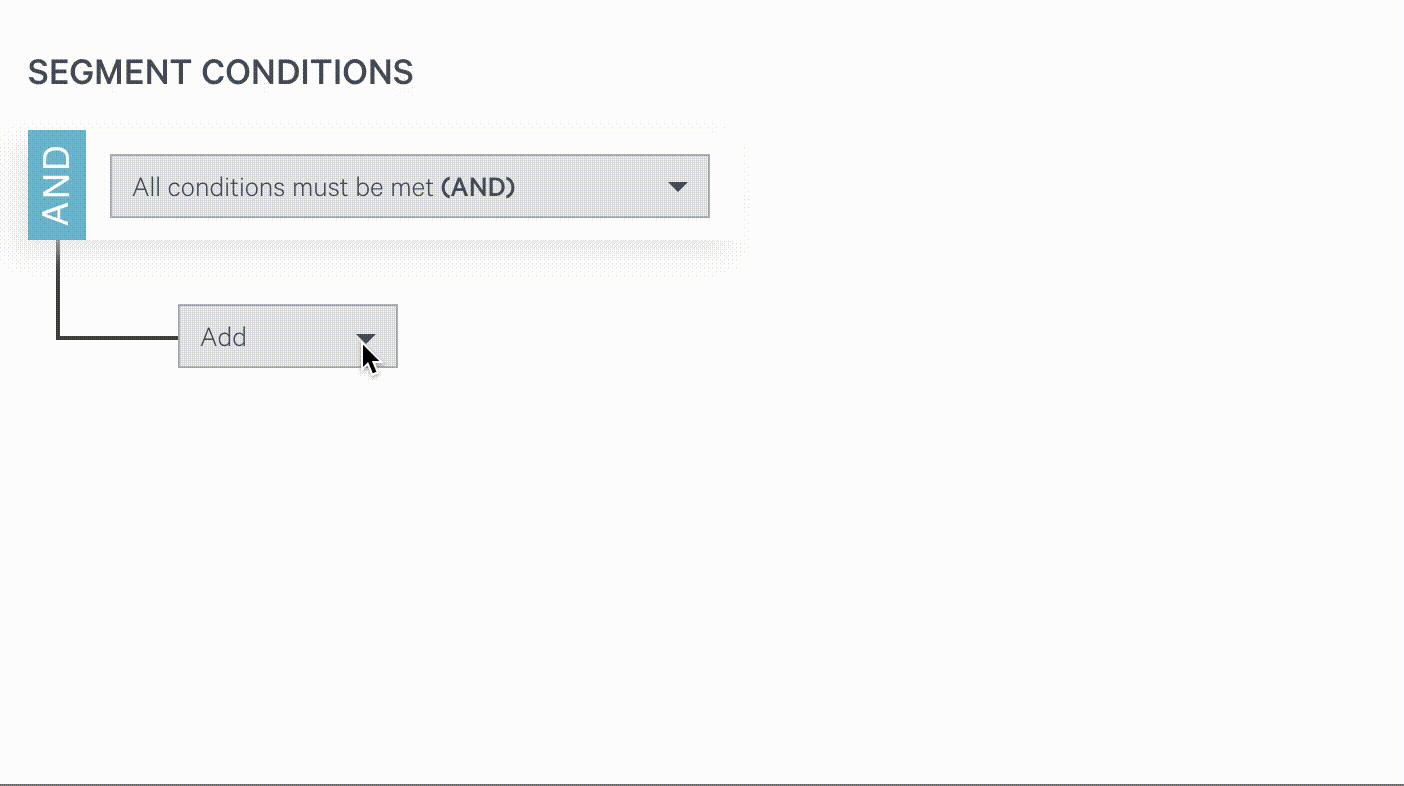
- Select the list that you uploaded in Step 2, and select true.

- Click Save.
Users in the uploaded list will not be able to enter the path. Additionally, users in the uploaded list who are currently in the path will be automatically removed from the path, and will no longer receive any emails in the path.
Limit how often users can enter a path
Ensure that your users receive different content by controlling how often a user can enter the same path.
To set an optional frequency limit for your path, open the path’s Settings panel and navigate to Limit frequency.
If a user qualifies for a path’s entry rules but meets the frequency limit, then they will skip the path. For example, if a path's frequency limit is 14 days, then a user cannot re-enter this path if they previously entered the path within the last 14 days.
Assign a subscription interest to your path
Use subscription preferences to let your users choose what content they want to receive based on their personal interests.
Once you’ve assigned subscription interests to a path, qualifying users will enter a path only if they are eligible based on their subscription preferences.
To assign a subscription interest to your path, open the path’s Settings panel. You can assign multiple interests to an email. If a given user is subscribed to any of the interests that have been assigned to a path, then they are eligible to enter the path.
Comments
0 comments
Article is closed for comments.