A path consists of a series of Touch Points (Email steps), and Conditions (Segment, User action, and Timing steps). The Condition steps let you control what happens to your readers as they engage with each of your emails.
Build a path
When you start building your path, you may find it easier to plan out Touch Points before you start adding in the Conditions, or you may find it easier to customize each Touch Point with Conditions as you build. The choice is up to you!
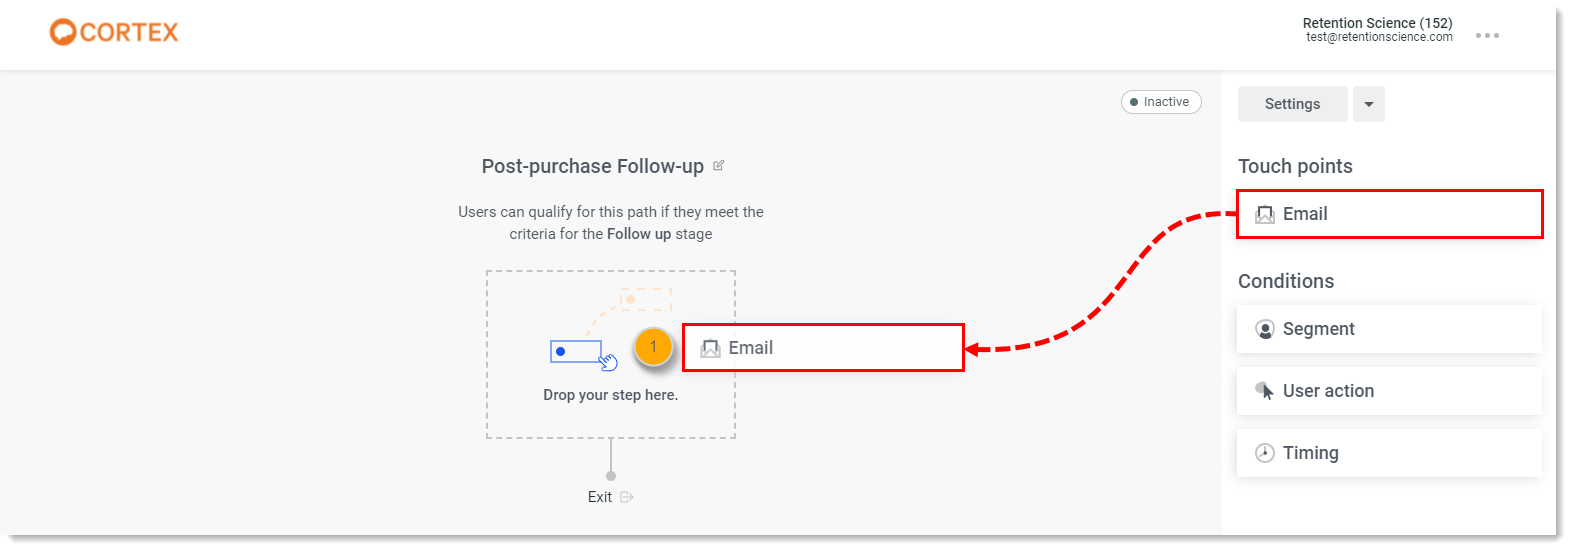
- Drag an Email step into your path.
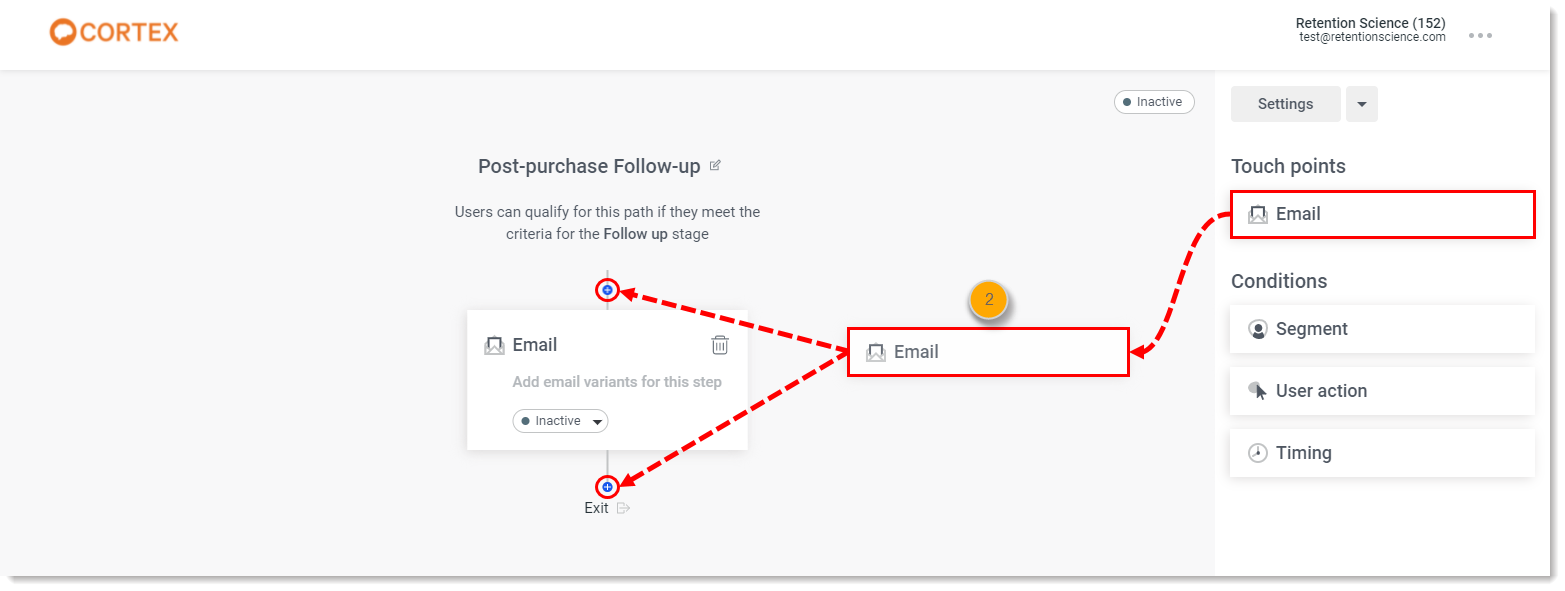
- Drag the next Touch point or Condition step into your path. When you do, nodes appear to indicate where the step can be placed in your workspace.
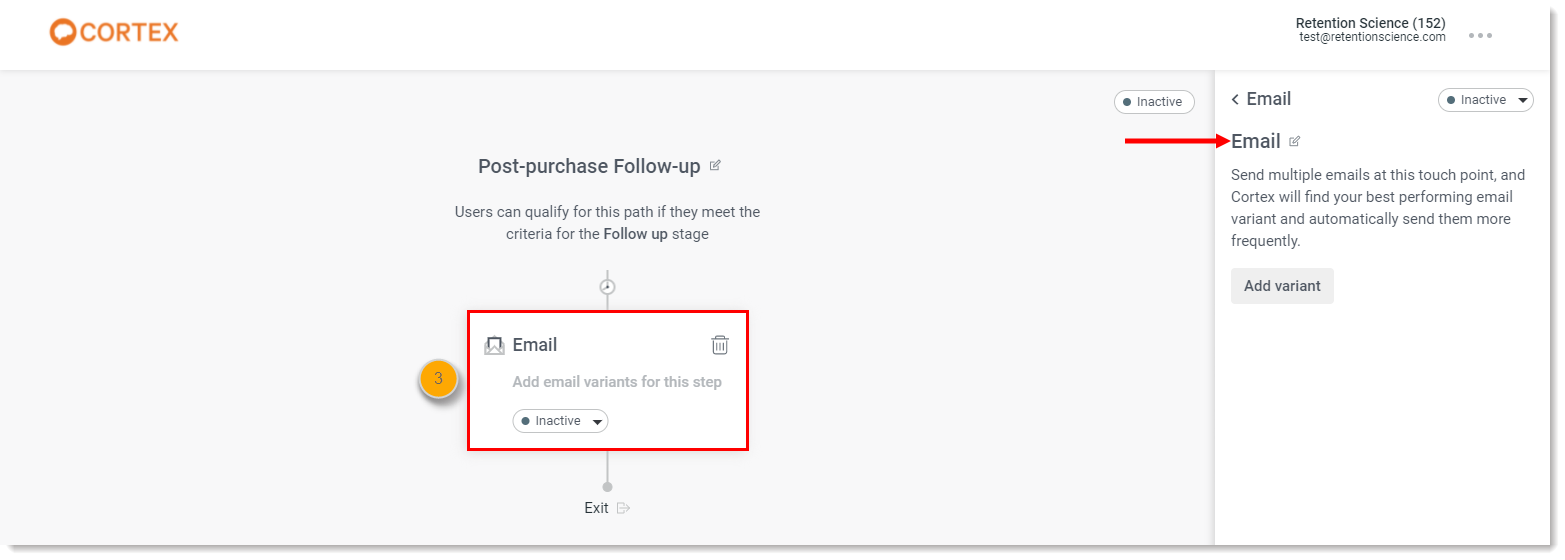
- Click on any step to configure the step’s settings in the side panel.
Set the status of a step
The status of a step determines whether users in the path can enter the step. There are two different statuses:
- Active - When a step is active, then users in a path always enter the step.
- Inactive - When a step is inactive, users moving through the path always skip the step and move onto the next active step. Only Email, Segment, and User action steps can be inactive.
An Email step has to have at least one active variant before you can activate it. Segment and User action steps are in the "Active" status by default when they're added to your path. Timing steps don't have a status; users always abide by the configured rules when they enter the step.
To change a step’s status:
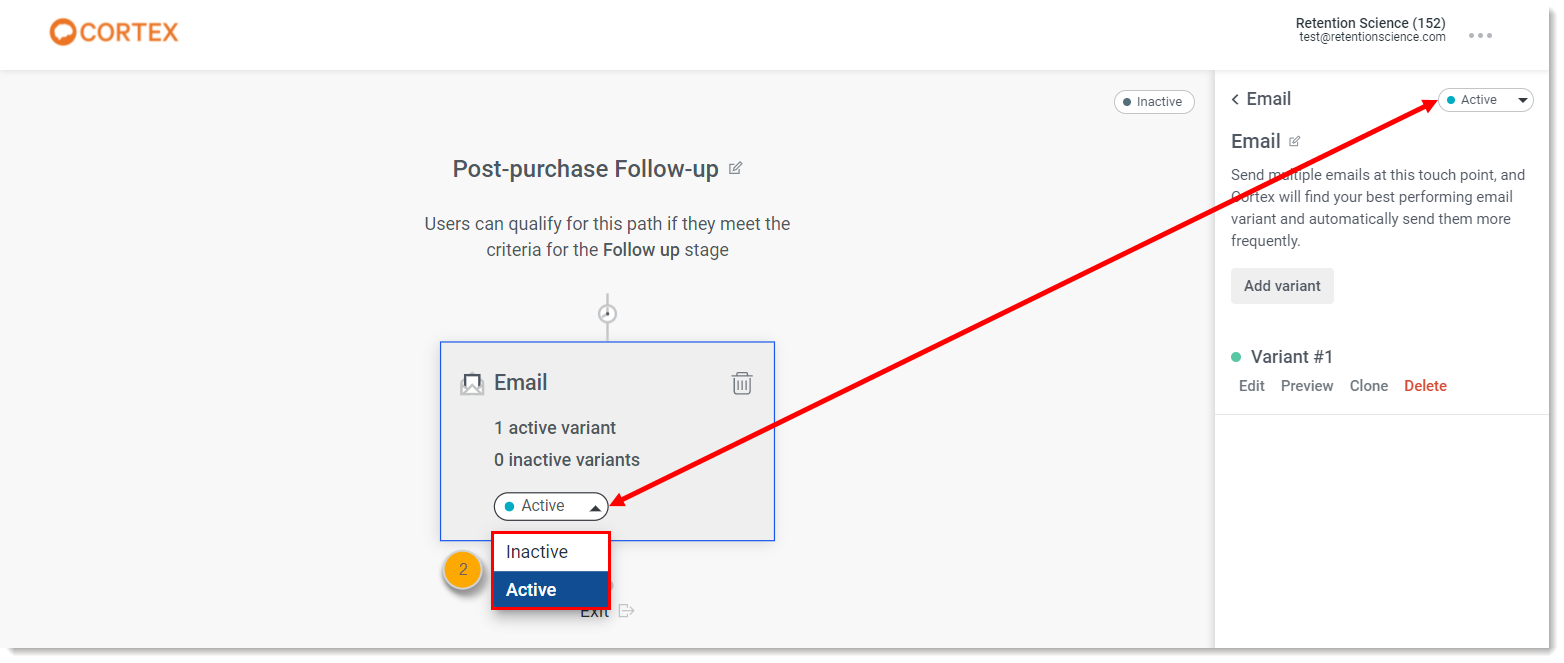
- Click on the status drop-down menu in the step, or click on the step and click the status drop-down menu in the side panel.
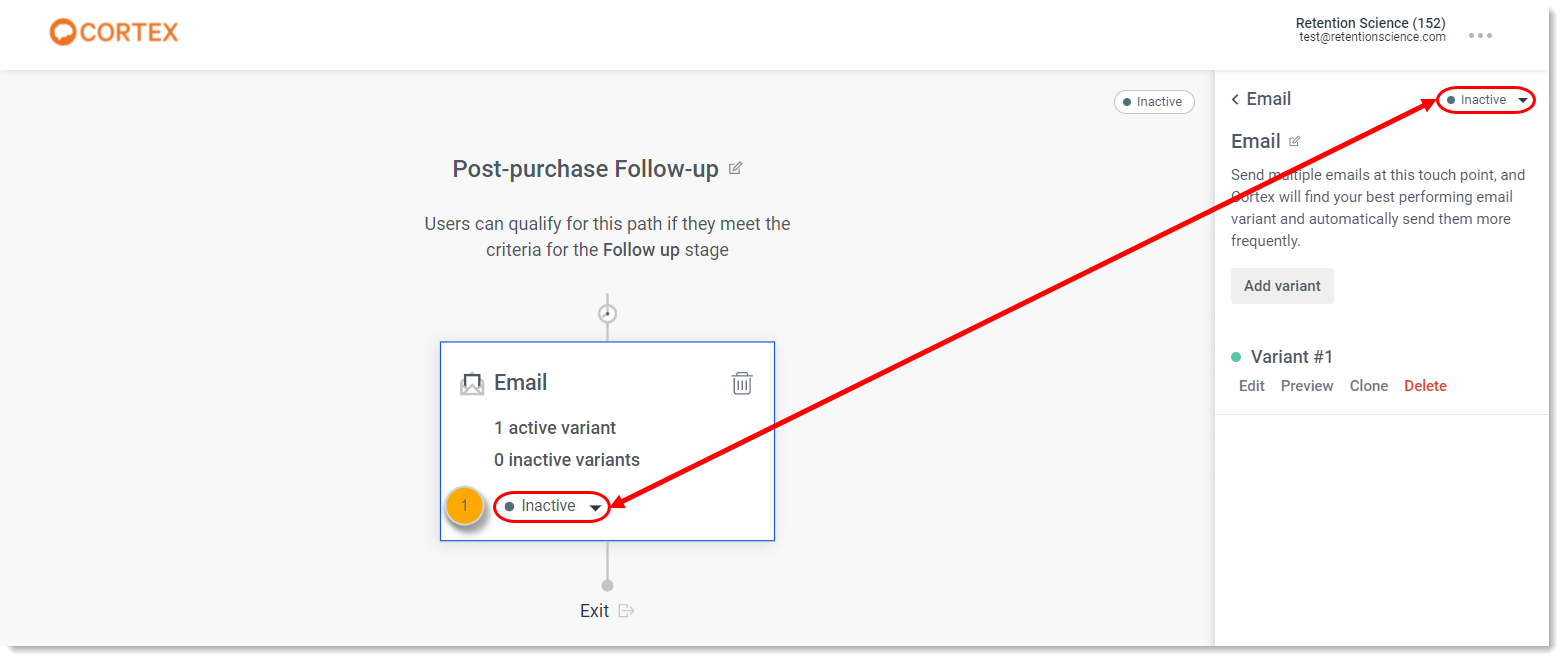
- Select "Active" or "Inactive" from the drop-down menu. The status changes in both the step and the side panel.
Comments
0 comments
Article is closed for comments.