- Postman installation
- Updating user attributes
- Pre-setup instructions
- Update a single user
- Update batch users
- Testing custom transactional API
- Pre-setup instructions
- Sending a custom transactional email to a single user
- Sending a custom transactional email to multiple users
Postman installation
- Download Postman.
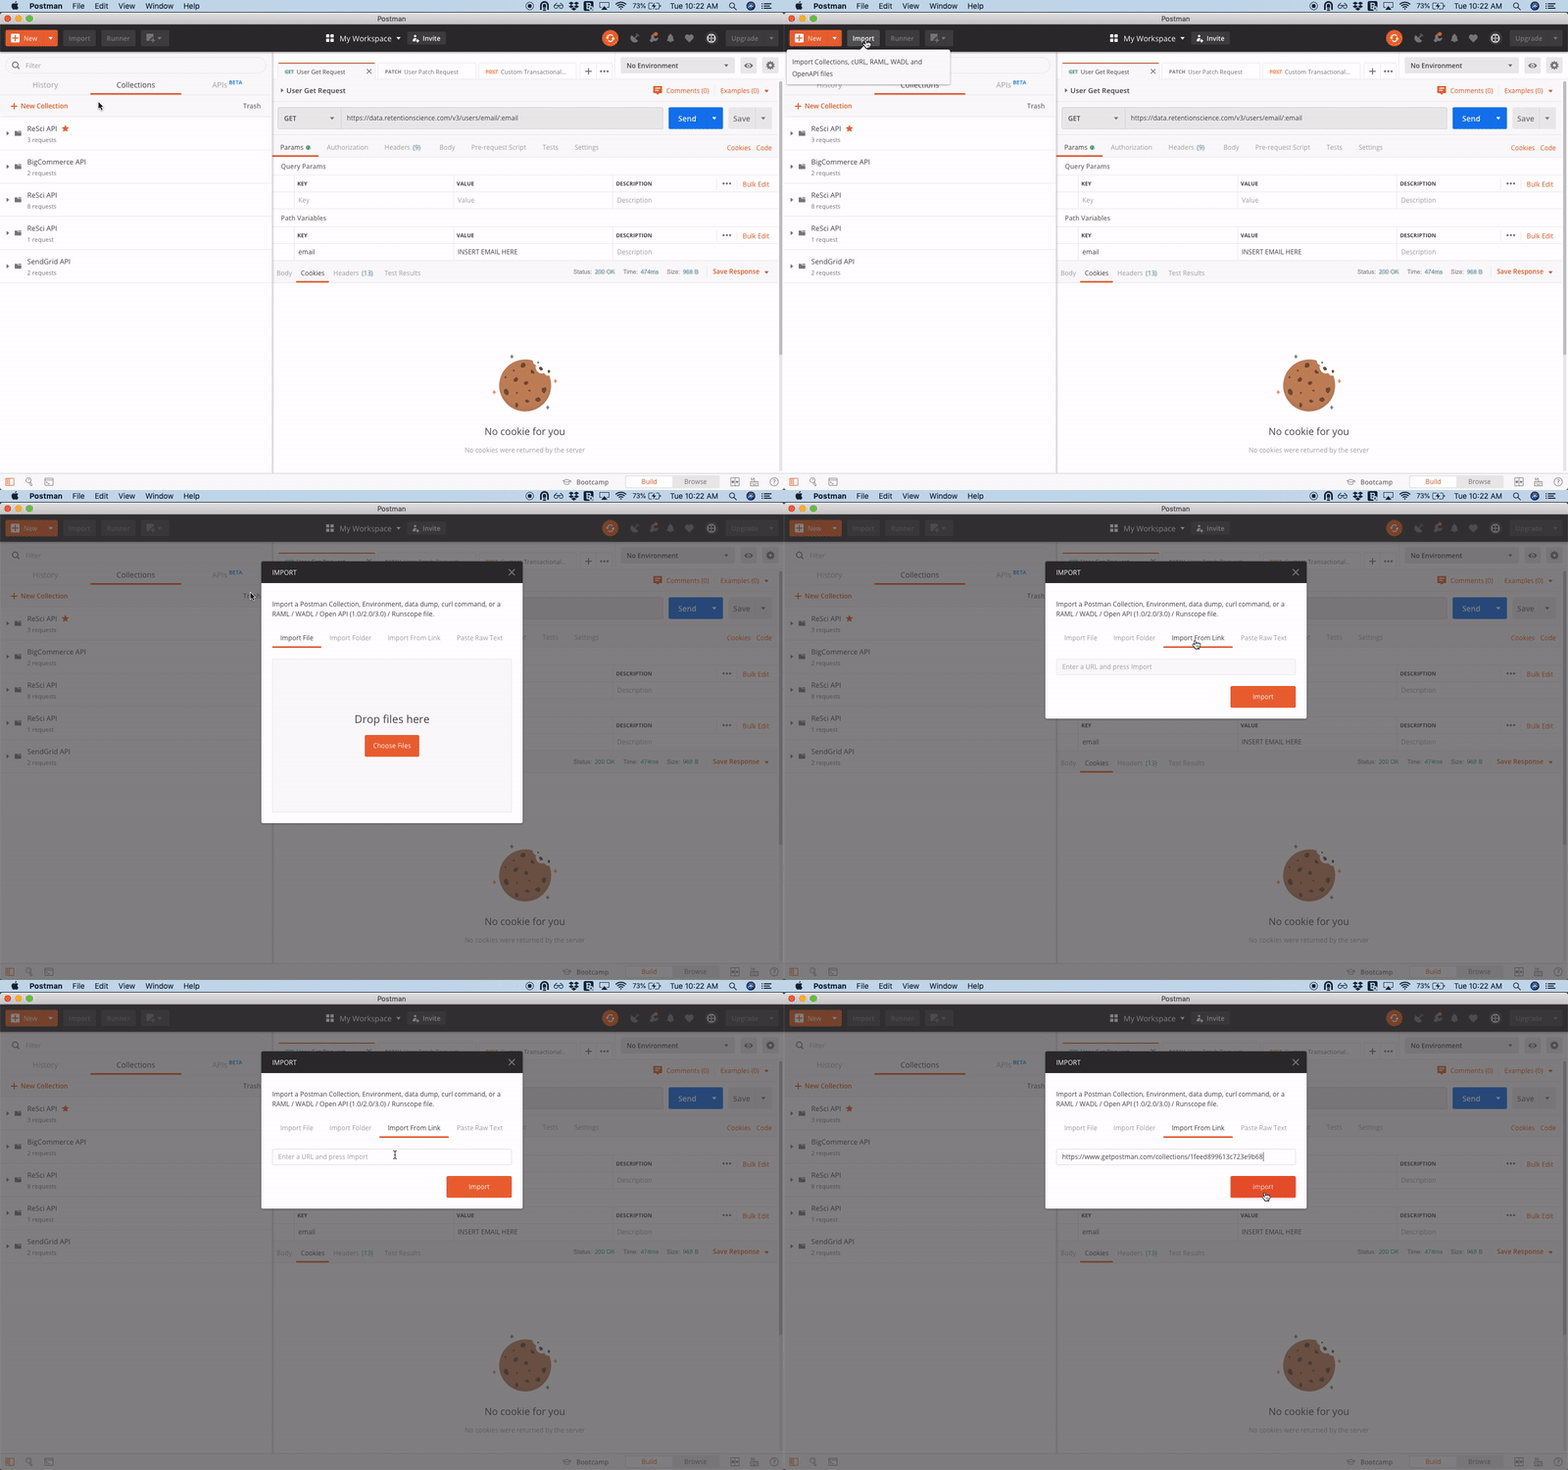
- Open Postman and Click Import > Import From Link.
- Paste link: “https://www.getpostman.com/collections/1feed899613c723e9b68“
- Click Import.
Updating user attributes
| Important: Before making any requests be sure to update your API KEY in the headers section. Additional documentation on the User Patch API can be found here. |
Pre-setup instructions
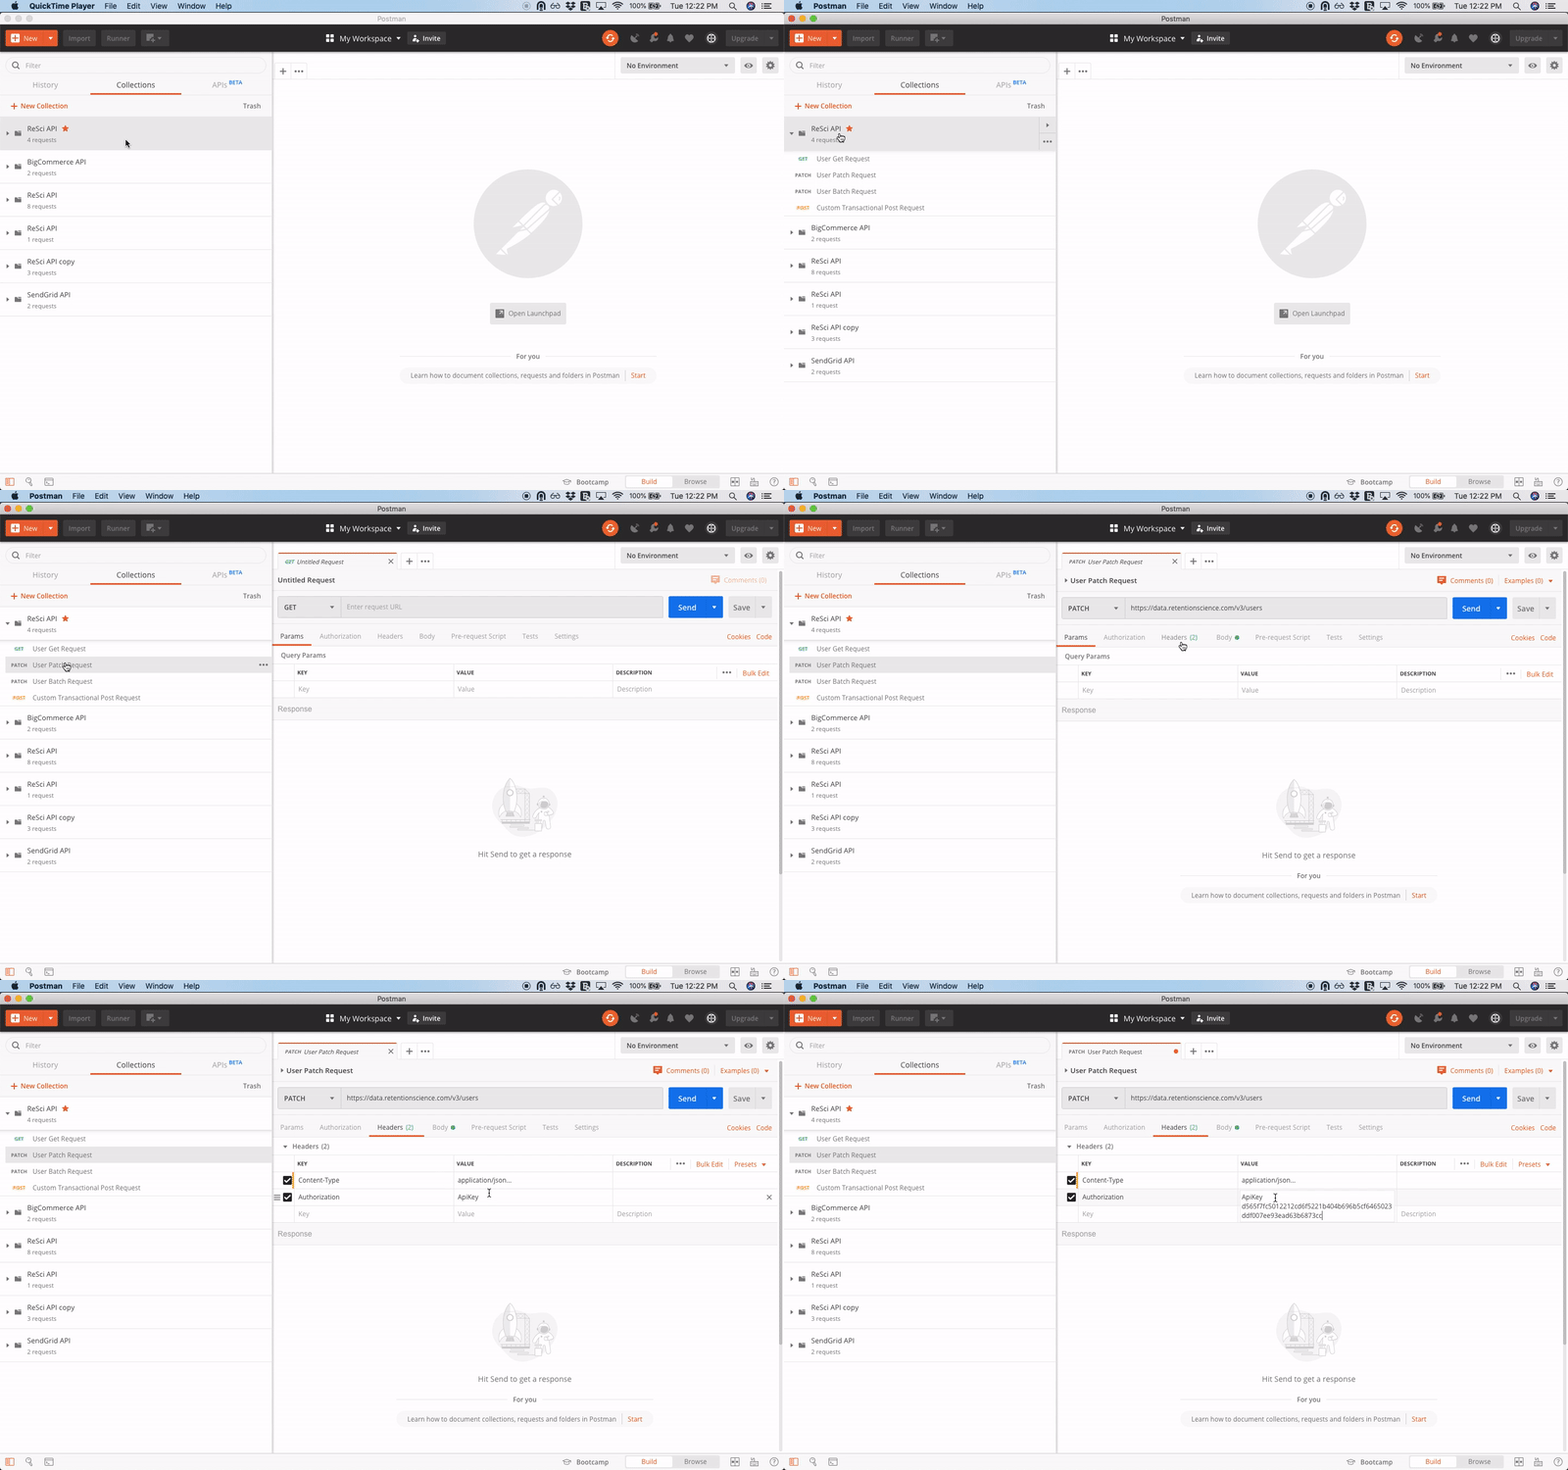
- Go to the "ReSci API" collection.
- Click on the request you want to make.
- Click on the Headers column and add in your API Key.
- Click Cmd + s to save the configuration.
Update a single user
- Go to ReSci API > User Patch Request > Params Column.
- Add in a "Key" (user attribute name).
- Add in a "Value" (user attribute value).
- If you need to update multiple key / values make sure you add them into the parameters.
- Example:
- Key: email
- Value: test@retentionscience.com
- Click Send.
Update batch users
- Save .CSV file with user attributes. ** Must have an email column**
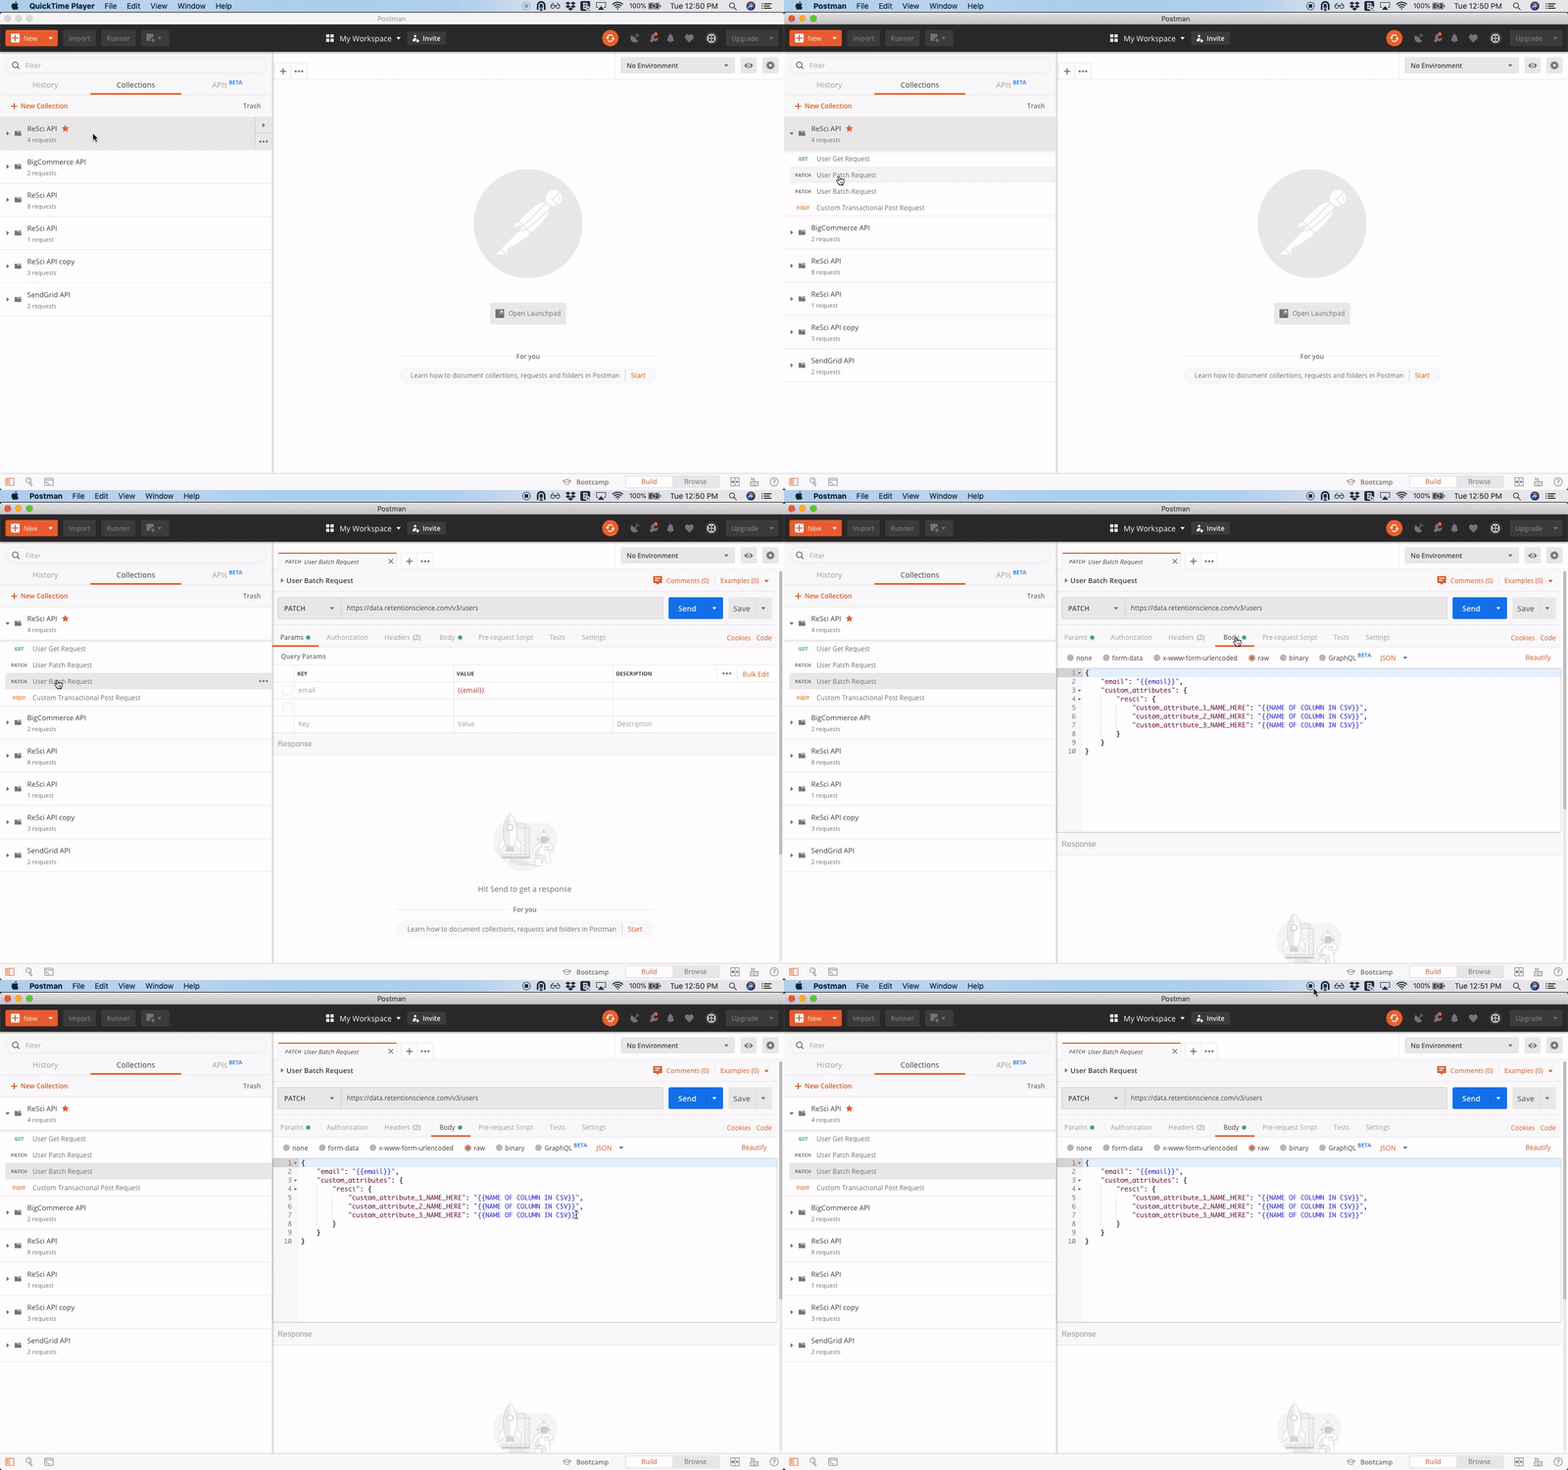
Note: Make sure the users included in the API call already exist in the database. If users are included in the API call do not already exist in Cortex they will be sent the welcome flow. - Go to ReSci API > User Batch Request > Body Column.
- If making an update to a custom user attribute update the resci object variables with the names of the custom user attribute.

- If making an update to a standard user attribute add in a key to the JSON object

- Click Cmd + s to save.
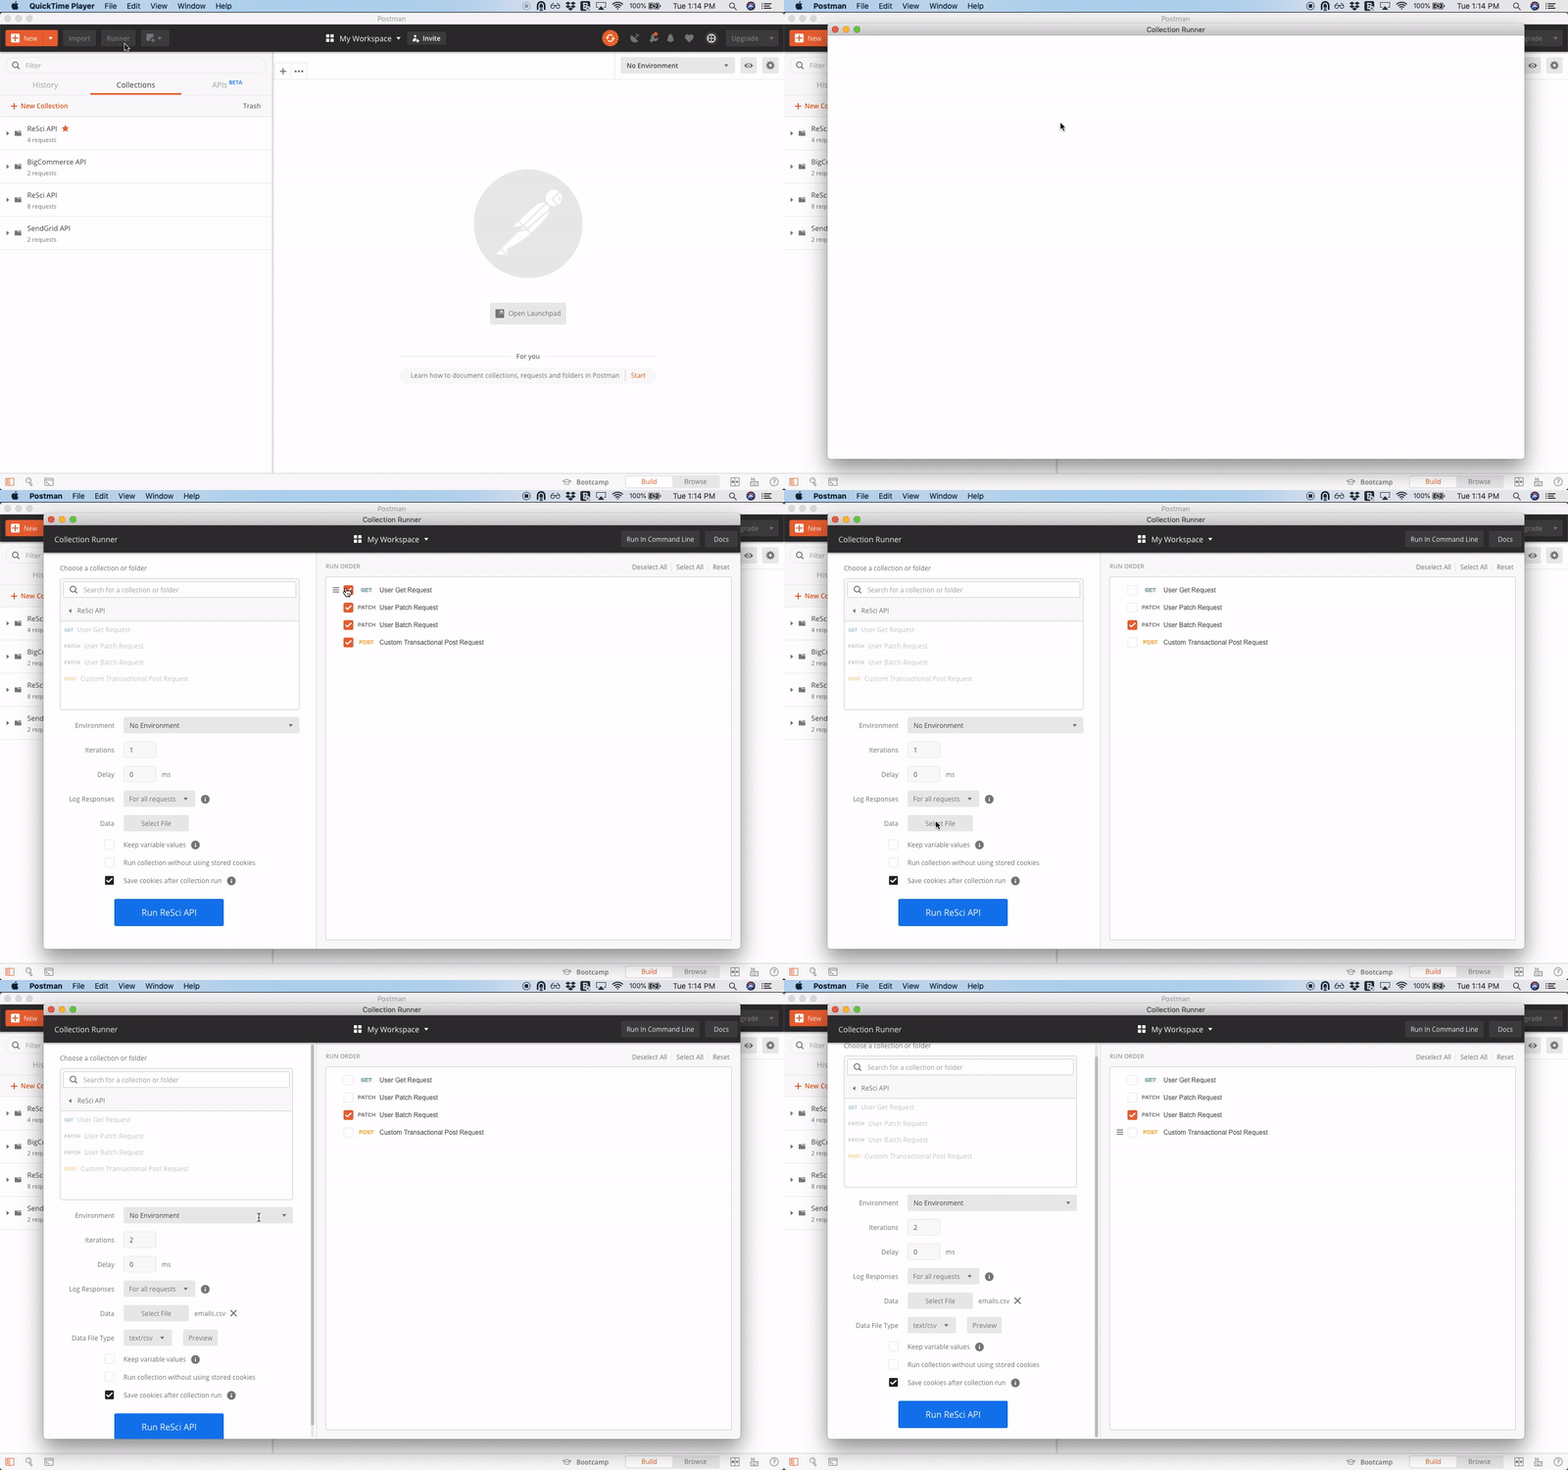
- Click on Runner.
- Select "ReSci API" collection.
- Uncheck all except "User Batch Request."
- Click on Select File > Upload CSV file.
- Click "Run ReSci API."
Testing custom transactional API
| Important: Before making any requests be sure to update your API KEY in the headers section. Additional documentation on the Send Custom Transactional Email API can be found here. |
Pre-setup instructions
- Go to the "ReSci API" collection.
- Click on the request you want to make.
- Click on the Headers Column and add in your API key.
- Click Cmd + s to save.
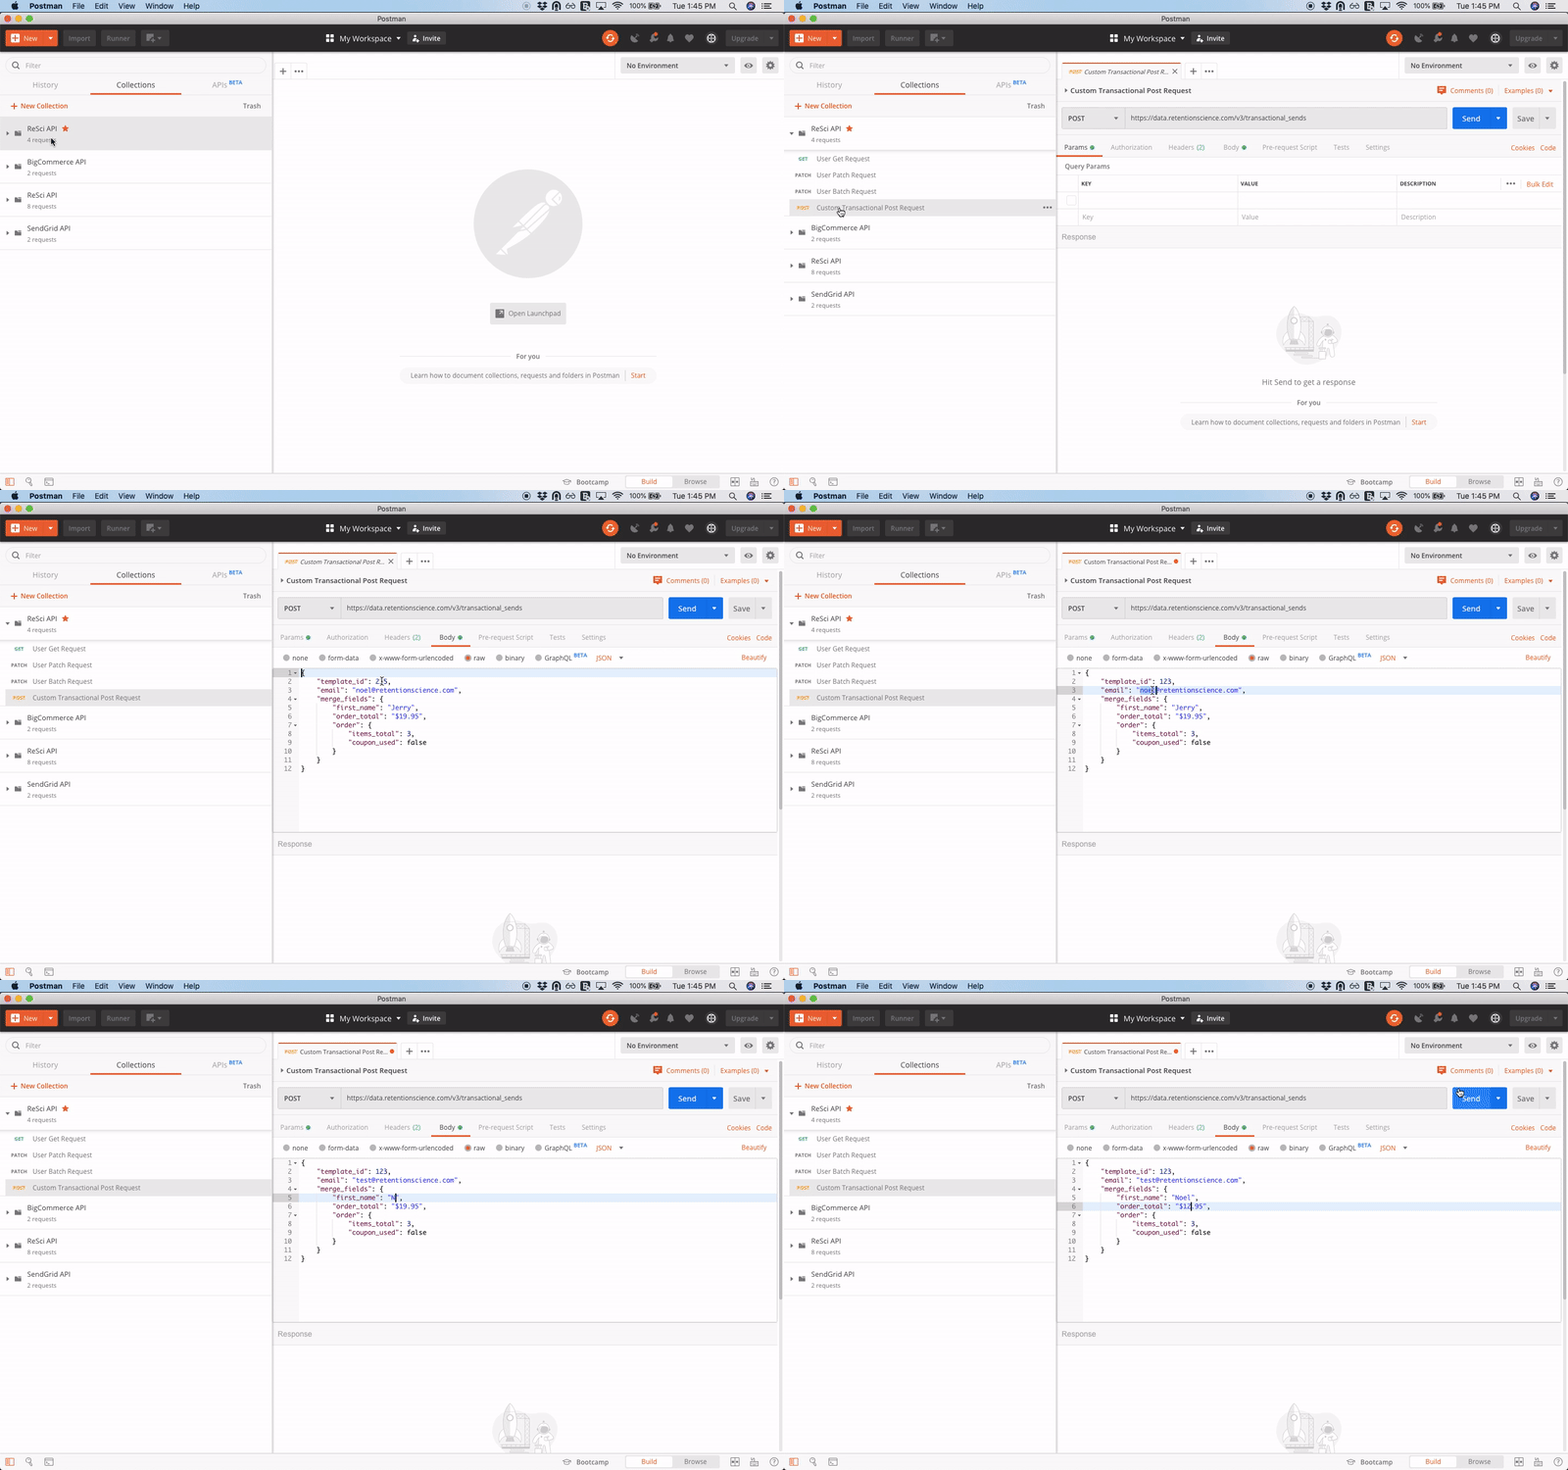
Sending a custom transactional email to a single user
- Go to ReSci API > Custom Transactional Post Request > Body Column.
- Update the values for:
- template_id
- merge_fields
- Click Send.
Sending a custom transactional email to multiple users
- Before doing anything in Postman, create a .csv file containing the list of users who should receive the transactional email, as well as any of the attributes that will be dynamically populated into the transactional email body.
Note: The columns of the .csv file must include email, as well as any of the other attributes that will be used in the email. In the example file below, the user attributes sent in the email will beorder_numberandprocessing_window.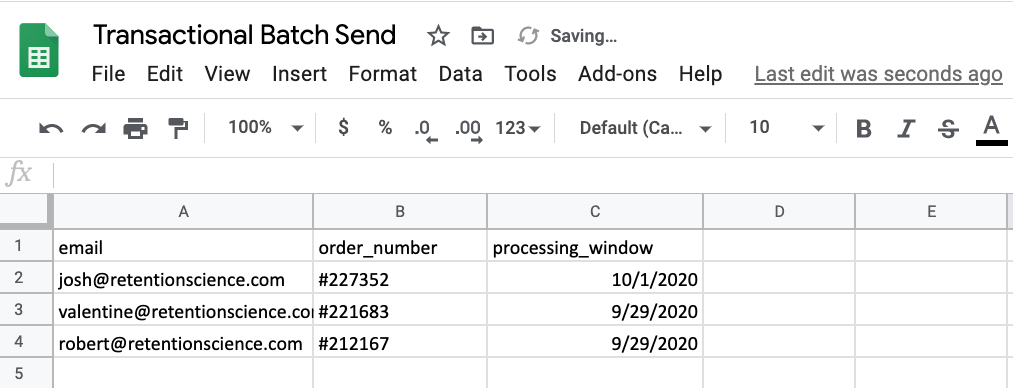
- Within Postman, go to ReSci API > Custom Transactional Post Request > Body Column.
- Update the values for:
template_id
- Rather than hardcoding the value for the email and merge field attributes, insert them as dynamic attributes, as seen in the image below. In this example, the API call will contain information on users' email, order_number, and processing_window values. Please be sure that the values of these attributes matches the column headers of the .csv file.

- Click Cmd + s to save.
- Click on Runner at the top left of the page.

- Select the collection ReSci API and make sure that the "Custom Transactional Request" is checked.

- Click Select File and choose the .csv file.

- Once the file is selected, the iterations value should be updated. Confirm that this matches the number of rows in the .csv file:

- Clicking Preview shows the attributes for each iteration. When clicking Preview you will see this the following view. Verify that this matches the .csv file:

- Click the Run ReSci API button.

Comments
0 comments
Please sign in to leave a comment.