Please click here if you are using the legacy version of Cortex.
This guide is designed to help you understand how simple hypothesis testing during the customer lifecycle stages can result in highly engaged subscribers. By learning how your best customers behave, Cortex can help you optimize your marketing strategy.
Through this guide, you will:
- Gain insight into how your subscribers respond to different types of subject lines, which impacts your email open rates.
- Understand what type of content is needed to improve email click rates.
Table of Contents
Cortex Stages
New To Your Brand Stage
The first step is to set your goals for the emails within this stage.
Specify your hypothesis
Static educational content will be more engaging for new users than product recommendations. Additionally, short subject lines will do a better job of grabbing users' attention and generating higher open rates.
Determine your variables
| Email #1 | Dynamic product recommendations |
| Email #2 | Static educational content |
Construct your email templates
Create two email templates:
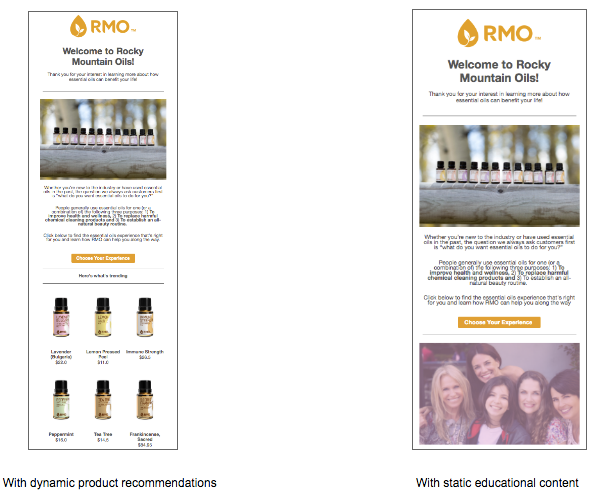
- One with dynamic product recommendations.
- One with static educational content.
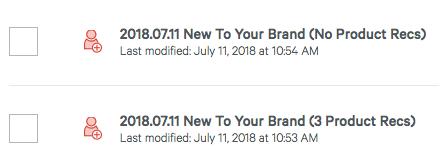
Make sure to use strong naming conventions for all your email template names so it’s easy to reference in reporting and you know exactly what content is in each email.
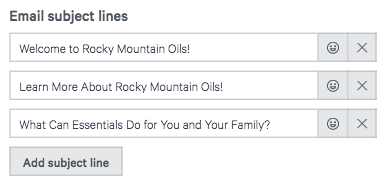
Create 3 subject lines to be used in both email templates. Your subject lines should:
- Welcome the customer to your brand.
- Educate the customer on your brand and offerings.
- State your value proposition.
Code the email templates using the HTML Builder or the Drag and Drop Email Template Builder. See the following resources for assistance:
- Building Emails in Retention Science
- Drag and Drop Template Builder Basics
- Merge Tag Overview
- Understanding Merge Tags for Dynamic Product Recommendations.
Your two email templates will look something like this:
Hypothesis Testing
Collect the data
Establish duration of this hypothesis test, we recommend 6-8 weeks to collect enough data to be statistically significant. Based on the volume of your database this timeframe could be shorter.
Compare results
For the population of users that opened the email, how many clicked and landed on-site? We measure success by CTOR (click to open rate), which is a strong metric for understanding the engagement of your users.
Iterate next phases based on results
Based on the results of this test, you have now identified which type of message your new users are expecting after signing up. You also have started to uncover insight into what type of subject line formats generates enough interest to prompt your users to open your messages.
Cart Abandon Stage
The first step is to set your goals for the emails within this stage.
Specify your hypothesis
At this stage of their lifecycle users will be more interested in actual products than they are in static or educational content. By showing more dynamic product recommendations in this stage we should see higher engagement.
Determine your variables
Choose one of the following options to construct:
| Option 1 | |
| Email #1 | Single item abandoned and 3 dynamic product recommendations. |
| Email #2 | Single item abandoned and 6 dynamic product recommendations. |
| Option 2 | |
| Email #1 | Single item abandoned only. |
| Email #2 | No items abandoned, only a call to action for the user to click to find out what was abandoned. |
| Option 3 | |
| Email #1 | Single item abandoned, 3 product recommendations and prices of those items. |
| Email #2 | Single item abandoned, 3 product recommendations and no prices shown. |
Construct your email templates
Select one of the options above and create two email templates.
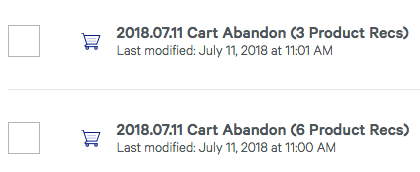
Make sure to use strong naming conventions for all your email template names so it’s easy to reference in reporting and you know exactly what content is in each email.
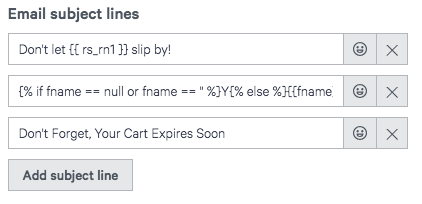
Create 3 subject lines to be used in both email templates. Your subject lines should:
- Include product name of item left in cart.
- Include user’s first name.
- Create a sense of urgency.
See our Merge Tag Overview and our Advanced Merge Tags article to learn how to add personalization and dynamic content to your subject line:
Code the email templates using the HTML Builder or the Drag and Drop Email Template Builder. See the following resources for assistance:
- Building Emails in Retension Science
- Drag and Drop Template Builder Basics
- Understanding how the Cart Abandon stage works
- Understanding dynamic merge tags in Cart Abandon emails
- Understanding Merge Tags for Dynamic Product Recommendations
Depending on the option you choose, your two email templates will look something like this:
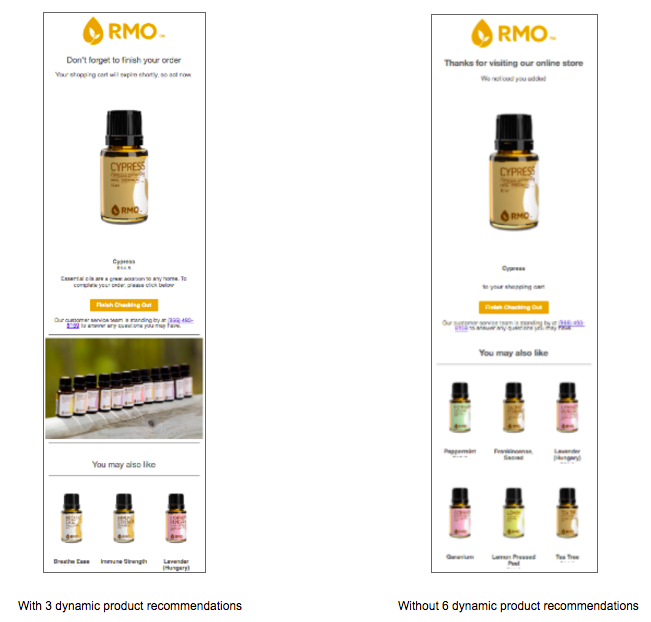
Option 1:
- Single item abandoned and 3 dynamic product recommendations.
- Single item abandoned and 6 dynamic product recommendations.
Option 2:
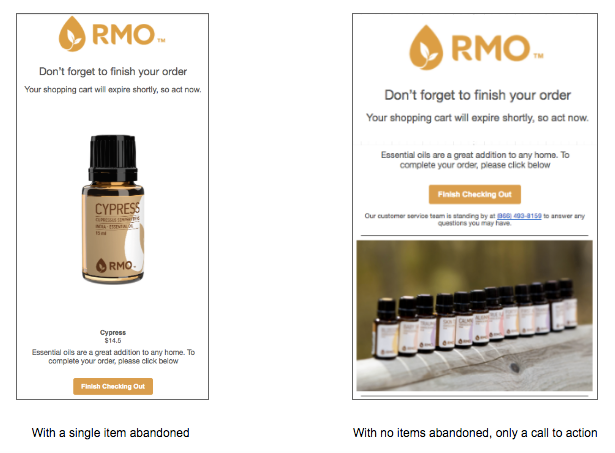
- Single item abandoned only.
- No items abandoned, only a call to action for the user to click to find out what was abandoned.
Option 3:
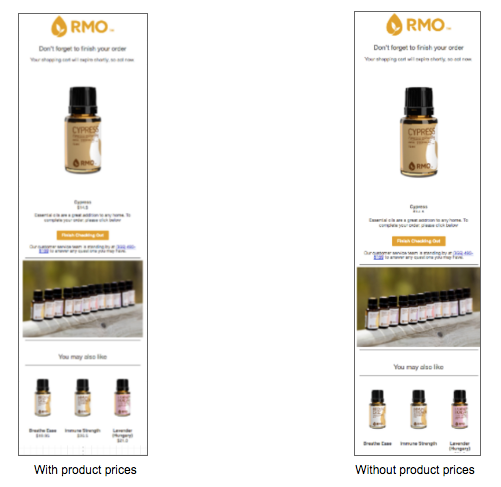
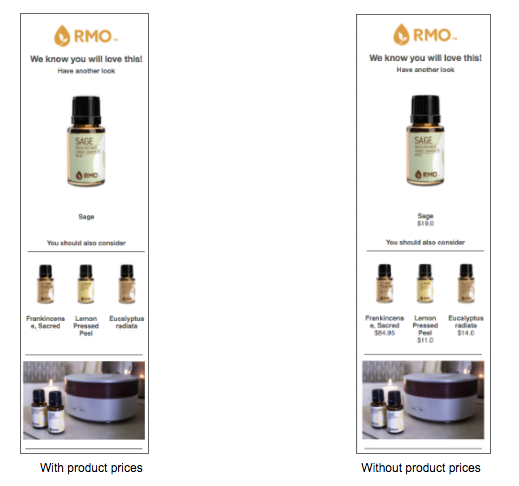
- One with item abandoned, 3 product recommendations, and prices of those items.
- One with item abandoned, 3 product recommendations, and no prices shown.
Hypothesis Testing
Collect the data
Establish duration of this hypothesis test, we recommend 6-8 weeks to collect enough data to be statistically significant. Based on the volume of your database this timeframe could be shorter.
Compare results
For the population of users that opened the email, how many clicked and landed on-site? We measure success by CTOR (click to open rate), which is a strong metric for understanding the engagement of your users.
Iterate next phases based on results
Based on the results of this test, you have now identified which type of message your new users are expecting after signing up. You also have started to uncover insight into what type of subject line formats generates enough interest to prompt your users to open your messages.
Browse Abandon Stage
The first step is to set your goals for the emails within this stage.
Specify your hypothesis
At this stage of their lifecycle users will be more interested in actual products than they are in static or educational content. By showing more dynamic product recommendations in this stage we should see higher engagement.
Determine your variables
Choose one of the following options to construct:
| Option 1 | |
| Email #1 | Single item abandoned and 3 dynamic product recommendations. |
| Email #2 | Single item abandoned and 6 dynamic product recommendations. |
| Option 2 | |
| Email #1 | Single item abandoned only. |
| Email #2 | No items abandoned, only a call to action for the user to click to find out what was abandoned. |
| Option 3 | |
| Email #1 | Single item abandoned, 3 product recommendations and prices of those items. |
| Email #2 | Single item abandoned, 3 product recommendations and no prices shown. |
Construct your email templates
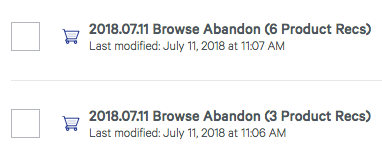
Select one of the options above and create two email templates.
Make sure to use strong naming conventions for all your email template names so it’s easy to reference in reporting and you know exactly what content is in each email.
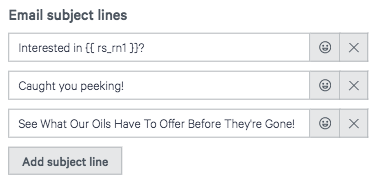
Create 3 subject lines to be used in both email templates. Your subject lines should:
- Include product name of item left in cart.
- Include user’s first name.
- Create a sense of urgency.
See our Merge Tag Overview and our Advanced Merge Tags article to learn how to add personalization and dynamic content to your subject line:
Code the email templates using the HTML Builder or the Drag and Drop Email Template Builder. See the following resources for assistance:
- Building Emails in Retention Science
- Drag and Drop Template Builder Basics
- Understanding how the Browse Abandon stage works
- Understanding dynamic merge tags in Browse Abandon emails
- Understanding Merge Tags for Dynamic Product Recommendations
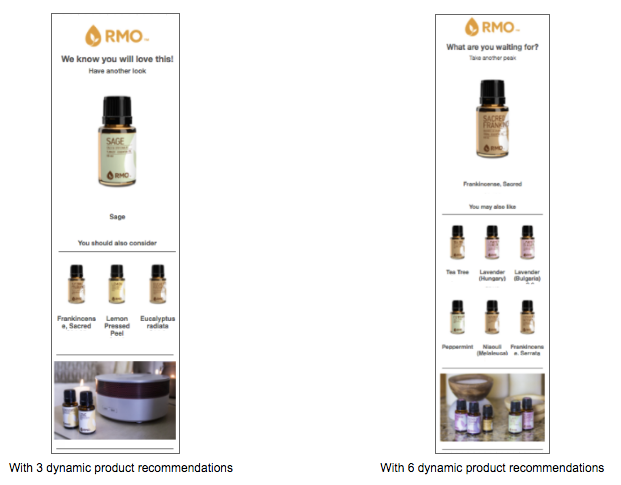
Depending on the option you choose, your two email templates will look something like this:
Option 1:
- Single item abandoned and 3 dynamic product recommendations.
- Single item abandoned and 6 dynamic product recommendations.
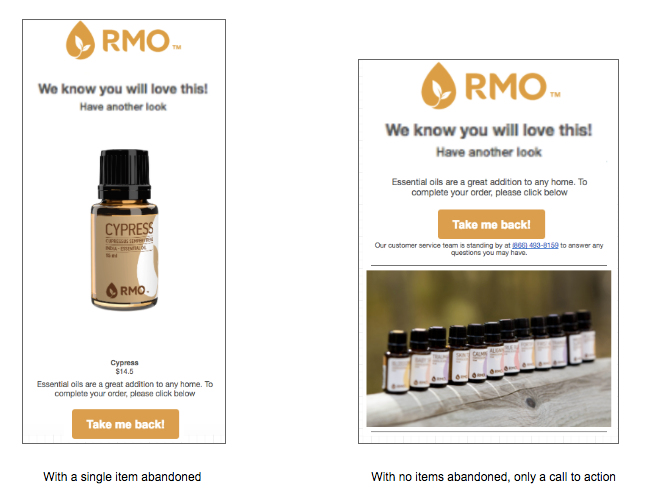
Option 2:
- Single item abandoned only.
- No items abandoned, only a call to action for the user to click to find out what was abandoned.
Option 3:
- Single item abandoned, 3 product recommendations and prices of those items.
- Single item abandoned, 3 product recommendations and no prices shown.
Hypothesis Testing
Collect the data
Establish duration of this hypothesis test, we recommend 6-8 weeks to collect enough data to be statistically significant. Based on the volume of your database this timeframe could be shorter.
Compare results
For the population of users that opened the email, how many clicked and landed on-site? We measure success by CTOR (click to open rate), which is a strong metric for understanding the engagement of your users.
Iterate next phases based on results
Based on the results of this test, you have now identified which type of message your new users are expecting after signing up. You also have started to uncover insight into what type of subject line formats generates enough interest to prompt your users to open your messages.
Follow Up Stage
The first step is to set your goals for the emails within this stage.
Specify your hypothesis
After users have purchased an item they are more likely to click or interact with an email if it shows the product that they recently purchased.
Determine your variables
Choose one of the following options to construct:
| Option 1 | |
| Email #1 | Single item they purchased only. |
| Email #2 | No items they purchased, only a call to action (leave a review on site or check out your social media). |
| Option 2 | |
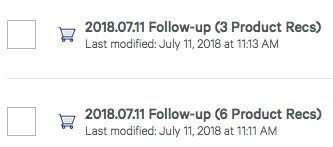
| Email #1 | Single item they purchased with 3 product recommendations. |
| Email #2 | Single item they purchased with 6 product recommendations. |
| Option 3 | |
| Email #1 | Only display 3 product recommendations (using merge tag 2, 3, 4). |
| Email #2 | Only display 6 product recommendations (using merge tag 2, 3, 4, 5, 6, 7). |
Construct your email templates
Select one of the options above and create two email templates.
Make sure to use strong naming conventions for all your email template names so it’s easy to reference in reporting and you know exactly what content is in each email.
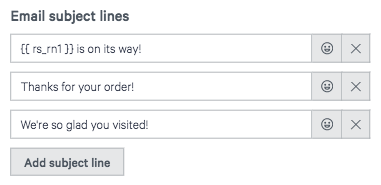
Create 3 subject lines to be used in both email templates. Your subject lines should:
- Include product name of item they purchased.
- Include user’s first name.
- Thank them for their business - gratitude!
See our Merge Tag Overview and our Advanced Merge Tags article to learn how to add personalization and dynamic content to your subject line:
Code the email templates using the HTML Builder or the Drag and Drop Email Template Builder. See the following resources for assistance:
- Building Emails in Retention Science
- Drag and Drop Template Builder Basics
- Understanding how the Follow Up Stage works
- Understanding Merge Tags for Dynamic Product Recommendations
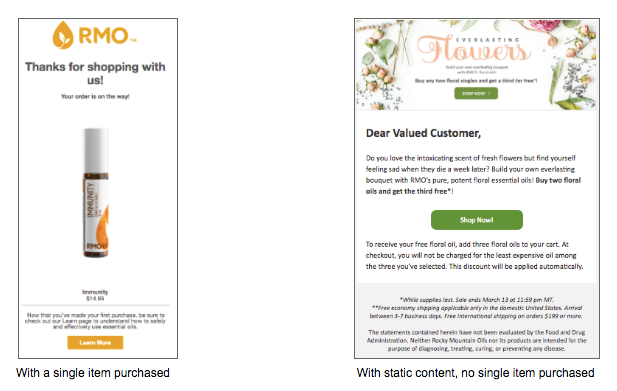
Depending on the option you choose, your two email templates will look something like this:
Option 1:
- Single item they purchased only.
- No items they purchased, only a call to action (leave a review on site or check out your social media).
Option 2:
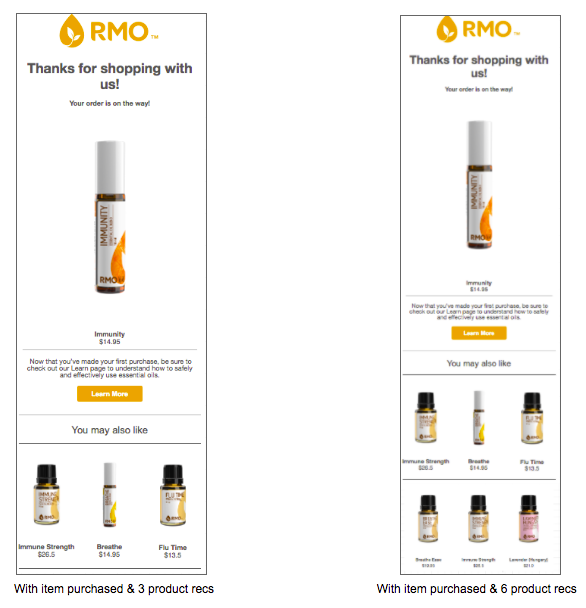
- Single item they purchased with 3 product recommendations.
- Single item they purchased with 6 product recommendations.
Option 3:
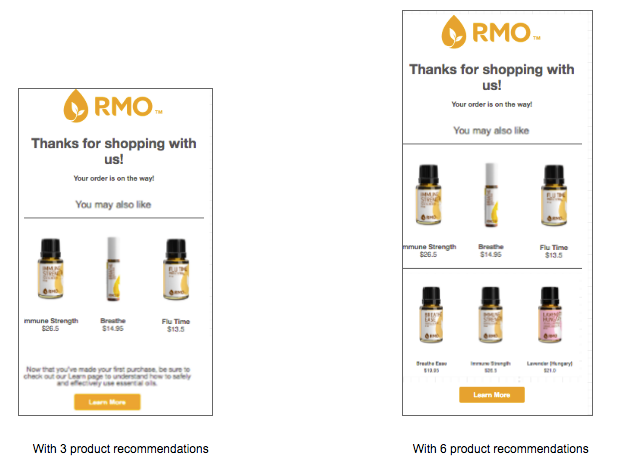
- Only display 3 product recommendations (using merge tag 2, 3, 4).
- Only display 6 product recommendations (using merge tag 2, 3, 4, 5, 6, 7).
Hypothesis Testing
Collect the data
Establish duration of this hypothesis test, we recommend 6-8 weeks to collect enough data to be statistically significant. Based on the volume of your database this timeframe could be shorter.
Compare results
For the population of users that opened the email, how many clicked and landed on site? We measure success by CTOR (click to open rate), which is a strong metric for understanding the engagement of your users.
Iterate next phases based on results
Based on the results of this test, you have now identified which type of message your new users are expecting after signing up. You also have started to uncover insight into what type of subject line formats generates enough interest to prompt your users to open your messages.
Additional Items
Smart Segments for lead generation and advertising
Goals
To target new users via marketing channels like Facebook and Google Audiences with ReSci’s Smart Segments.
What you’ll need
- 1 Smart Segment.
- 1 creative for your ad.
- Facebook, Google Analytics or other lead gen/advertising channel.
Steps to construct
Determine criteria for your targeted segment.
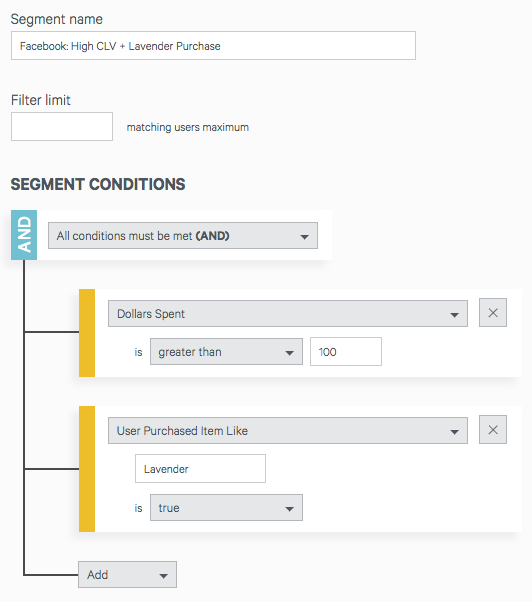
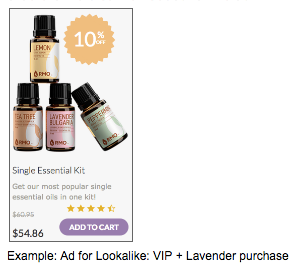
Option 1: Create a Smart Segment for VIP customers and a certain product affinity.
This example is for users that purchased over $100 in product and have ordered products that contain “lavender” in their name.
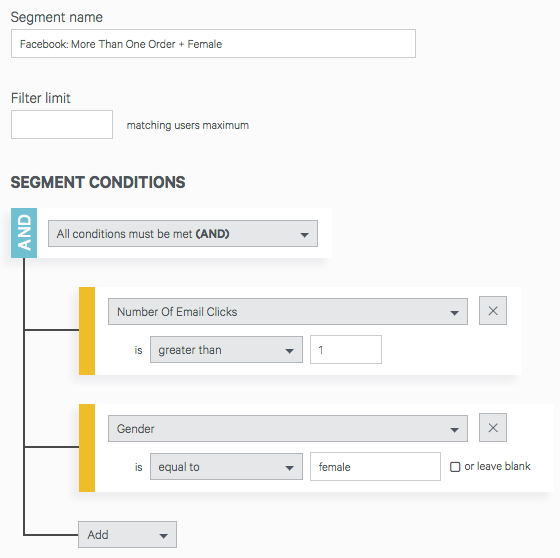
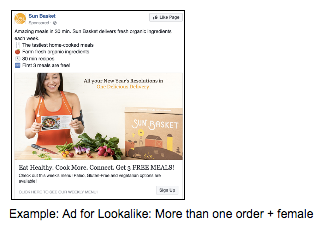
Option 2: Create a Smart Segment for number of orders is greater than one and gender is female.
This example is for users that have placed more than one order and are female (remember that ReSci will use “predictive gender” if that data is not available).
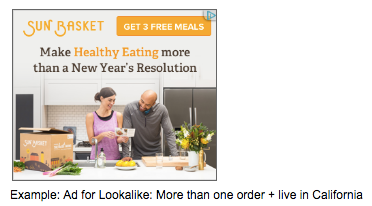
Option 3: Create a Smart Segment for number of orders is greater than one and state is California.
This example is for users that have placed more than one order and live in the state of California.
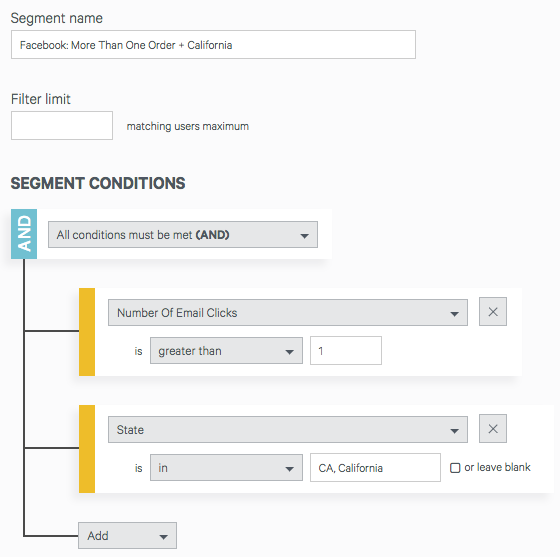
Next, export the segment for the appropriate channel.
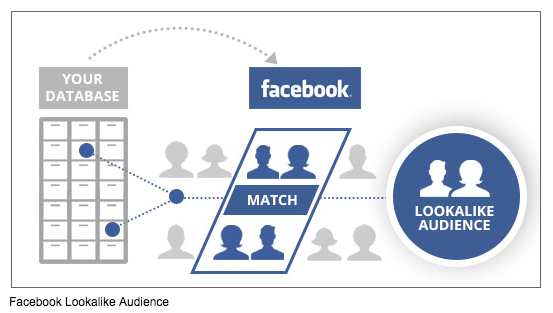
- Facebook Custom Audience.
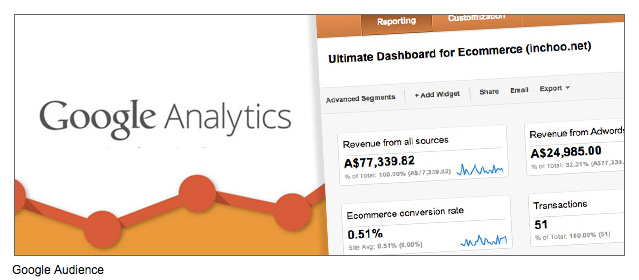
- Google Audience.
- ReSci Format (aka standard csv file for you to revise to your liking).

Then, curate the creative needed for the ad. See our examples below:
Finally, generate the campaign in the advertising channel.
For example, generate a Facebook Lookalike Audience or Google Audience which will target new users that are similar to the smart segment you are uploading.
Articles to reference:
- How Using Brand Ads in Unexpected Ways Drove Higher Installs for Lyft
- Exporting Smart Segments for your marketing
IP warming schedule
Welcome to your new IP address! Since you are new to the IP address we need to make sure we warm your IP, allowing you to gradually establish a good sender reputation. The process for warming your new IP address is pretty simple: gradually increase the volume of mail sent according to a predetermined schedule. This will help establish a reputation with ISP’s (Internet Service Providers) as a legitimate email sender.
Example IP warming schedule here.
Comments
0 comments
Please sign in to leave a comment.