
It's not uncommon to see preview text that contains a string of what looks like nonsense following the preview text you entered when creating your email. In the example below, you can see the preview text "What We Should Be Doing" followed by the word "Image" several times:
![]()
This happens because when email clients display preview text, they do not limit themselves to only your chosen pre-header text. To fill in any remaining space, the email client will reach into the body of the email to find additional preview content. Most commonly this results in image alt text being shown as preview text. While you can adjust your image alt text, adding blank space after your chosen pre-header is an even better solution, so that your email looks more like this in the inbox:
![]()
How to Create Blank Space in the Preview Header
Blank space can be added after your preview text in both the Drag and Drop Email Builder and the HTML Editor.
In the Drag and Drop Email Builder
Be sure not to fill out the preview text box in the email settings. Within the editor:
- Add an HTML content block to the very top of your template.

- In the HTML box, add the code from the gray box below.

- Within the code, replace "Insert hidden preview text here" with your chosen preview text.
In an HTML Template
Be sure not to fill out the preview text box in the email settings.
- Add the code from the gray box below to the pre-header section of the HTML template.

- Within the code, replace "Insert hidden preview text here" with your chosen preview text.
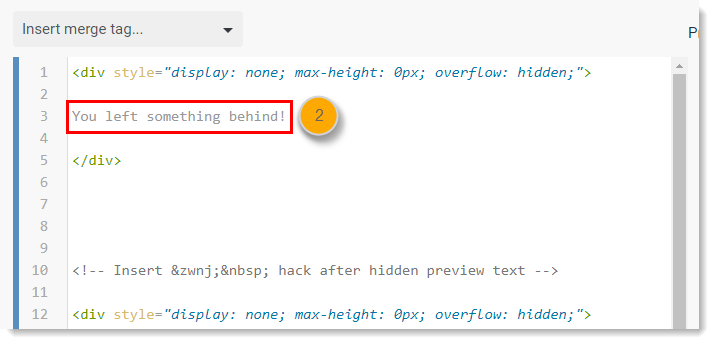
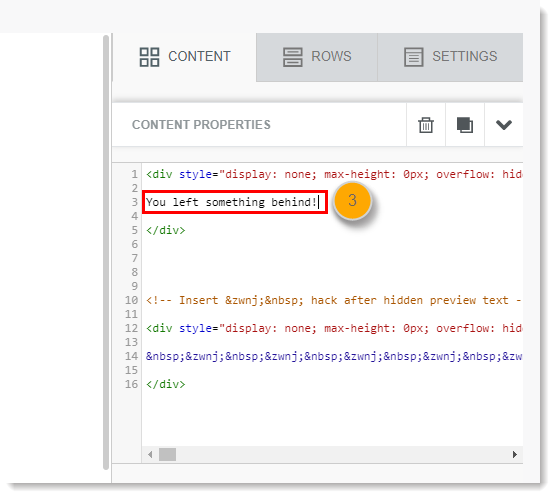
Code for Preview Header with Blank Space
<div style="display: none; max-height: 0px; overflow: hidden;">
Insert hidden preview text here.
</div>
<!-- Insert ‌ hack after hidden preview text -->
<div style="display: none; max-height: 0px; overflow: hidden;">
‌ ‌ ‌ ‌ ‌ ‌ ‌ ‌ ‌ ‌ ‌ ‌ ‌ ‌ ‌ ‌ ‌ ‌ ‌ ‌ ‌ ‌ ‌ ‌ ‌ ‌ ‌ ‌ ‌ ‌ ‌ ‌ ‌ ‌ ‌ ‌ ‌ ‌ ‌ ‌ ‌ ‌ ‌ ‌ ‌ ‌ ‌ ‌ ‌ ‌ ‌ ‌ ‌ ‌ ‌ ‌ ‌ ‌ ‌ ‌ ‌ ‌ ‌ ‌ ‌ ‌ ‌ ‌ ‌ ‌ ‌ ‌ ‌ ‌ ‌ ‌ ‌ ‌ ‌ ‌ ‌ ‌ ‌ ‌ ‌ ‌ ‌ ‌ ‌ ‌ ‌ ‌ ‌ ‌ ‌ ‌ ‌ ‌ ‌ ‌ ‌ ‌ ‌ ‌ ‌ ‌ ‌ ‌ ‌ ‌ ‌ ‌ ‌ ‌ ‌ ‌ ‌ ‌ ‌ ‌ ‌ ‌ ‌ ‌ ‌ ‌ ‌ ‌ ‌ ‌ ‌ ‌ ‌ ‌ ‌ ‌ ‌ ‌ ‌ ‌ ‌ ‌ ‌ ‌ ‌ ‌ ‌ ‌ ‌ ‌ ‌ ‌ ‌ ‌ ‌ ‌ ‌ ‌ ‌ ‌ ‌ ‌ ‌ ‌ ‌ ‌ ‌ ‌ ‌ ‌ ‌ ‌ ‌ ‌ ‌ ‌ ‌ ‌ ‌ ‌ ‌ ‌ ‌ ‌ ‌
</div>
Comments
0 comments
Please sign in to leave a comment.